Xbox One NAT Troubleshooting
If you are unable to join games on your Xbox One or communicate with friends through Xbox Live you might have a Network Address Translation (NAT) issue. If you do have a NAT error you will see an indicator on your Network Settings screen or possibly on your dashboard depending on your personal settings.
You will find your NAT status under Network Settings
Under Network Settings you will see NAT Type
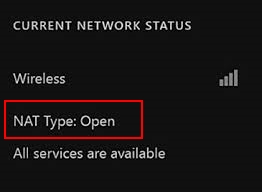
To find your NAT type or if you're having a NAT issue, you can test your connection. Here is how:Resolving NAT IssuesOn the Network Settings screen, you'll need to check to see if your NAT type is "Open". If your NAT type is "Open", then you should resolve your multiplayer issue. If your NAT type is "Moderate" or "Strict", you will need to continue to the sections below for continued troubleshooting.
- From the Network settings screen, select Test multiplayer connection.
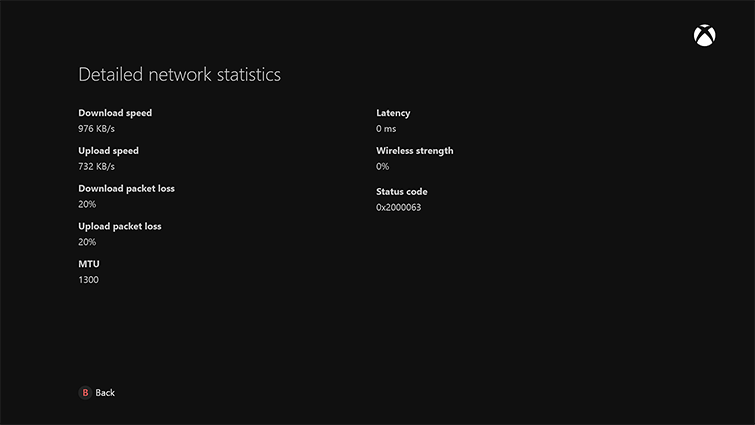
- After the test is complete, you will need to pull and hold both triggers and both bumperson your controller. This will display a Detailed network statistics screen.
- In the second column of the Detailed network statistics screen you will see a field called Detailed NAT information. At first, you will see(…)displayed in this field while your NAT type is being retested. Once you see NAT information displayed in this field, the test is complete.
- Press the B button on your controller to return to the Test multiplayer connection results.
- Select Continue to return to the Network settings screen and check your NAT type.
Preferred Method (Port Triggering)
Choose your brand of router:


Setting up a Comtrend for Port Triggering:
- Logging Into the router
You will need to open a internet browser(Chrome, Firefox, Internet Explorer) and in your address bar remove what address is there and type in 192.168.1.1.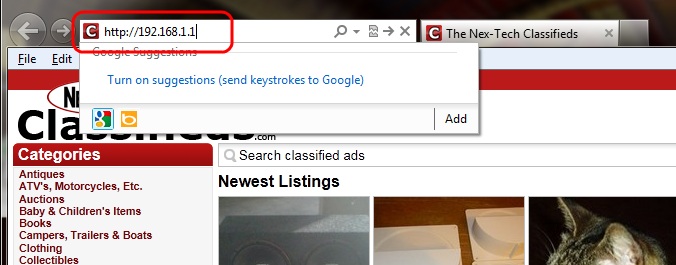
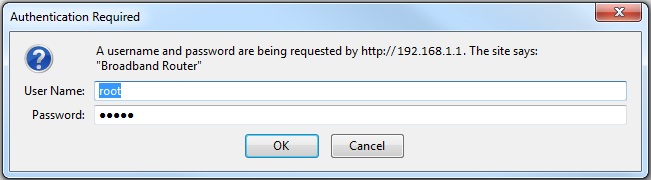
- You should see a pop up asking for a username and a password. This will indicate a connection to the router. In the User Name field you will type in user and the Password will also be user.
NOTE: If the Username and Password do not work, you may also try the following:
Username: root Password: central
Username: root Password: 12345
Username: support Password: support
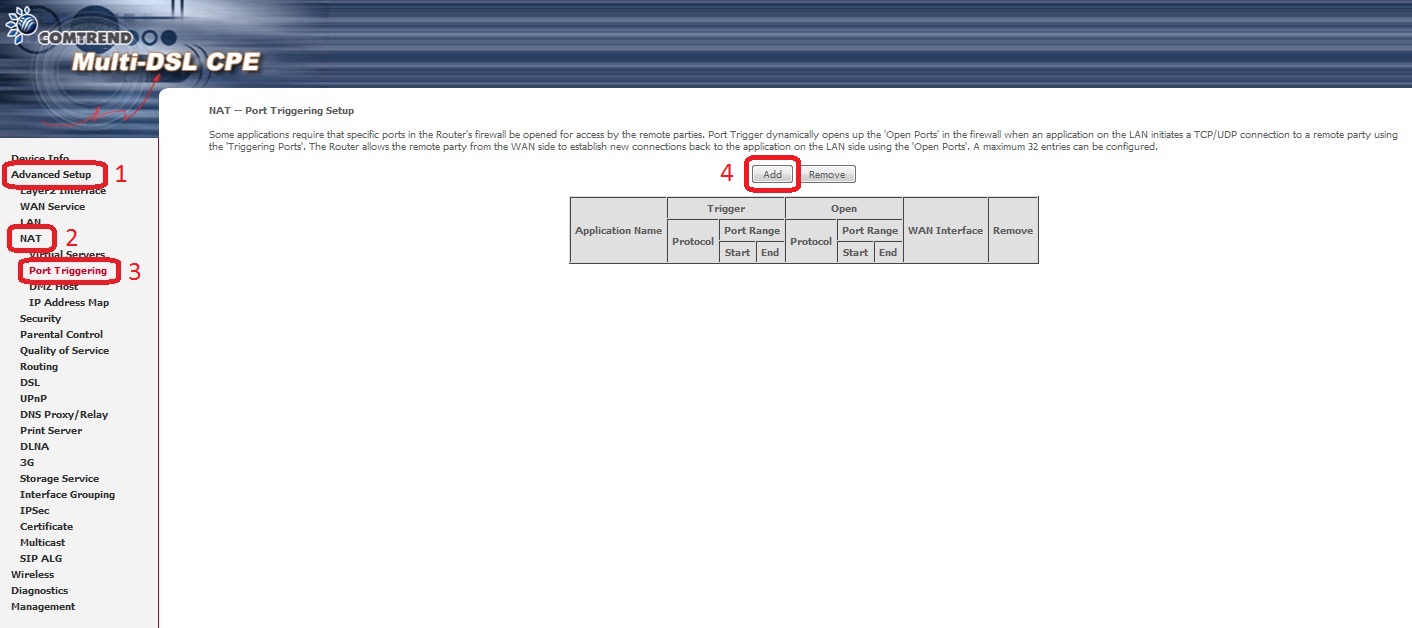
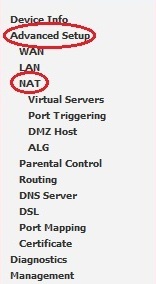
- At this point we should be logged into the router. We are going to now setup Port Triggering. You will need to click on Advanced Setup on the left side of the page. Then you will need to click on NAT and then Port Triggering. Finally from here you will need to click on Add.
- At this point we should be in NAT-Port Triggering. You will need to select the interface of pppoe_eth/ppp0.3. This is a drop down option under Use Interface. We now need to place in an Application Name. To do this you will see two bubbles to select, we need to select Custom Name and then type in Xbox One in that field. You will then enter in the information show in the picture below exactly as shown. Once that is done click Save/Apply.
Port 88 (UDP)
Port 3074(UDP and TCP)
Port 53 (UDP and TCP)
Port 500 (UDP)
Port 3544 (UDP)
Port UDP 4500 (UDP) - Port Triggering should now be enabled on the router. You may need to give the Comtrend a few minutes to save the information and for it to take affect. If you are still at this point still seeing a NAT issue please see our Alternate Method (Port Forwarding).
Setting up a Linksys for Port Triggering:
- You will need to open a internet browser(Chrome, Firefox, Internet Explorer) and in your address bar remove what address is there and type in 192.168.1.1.
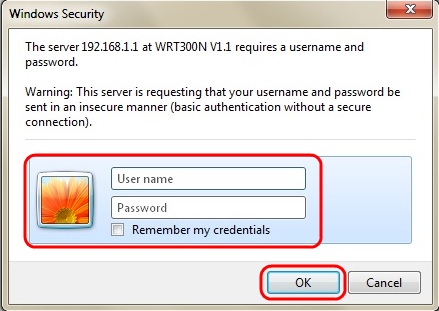
- Next you should see a pop up asking for a username and password. This will indicate a connection to the router. We will skip the User name field and in the Password field you will type in admin. This is the default login for a Linksys router, unless you have manually changed it, then press OK.
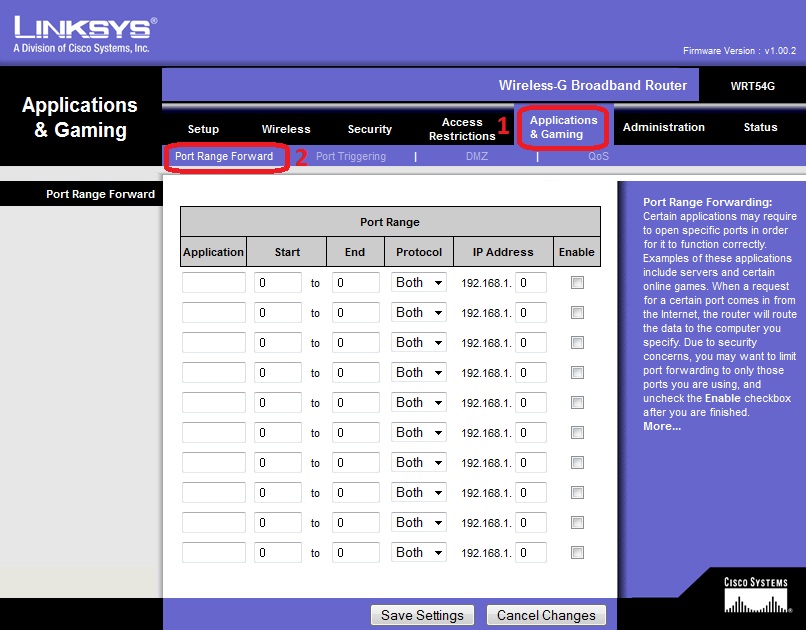
- Once in the Linksys router you will need to click on Applications & Gaming at the top and then Port Triggering in the sub-menu.
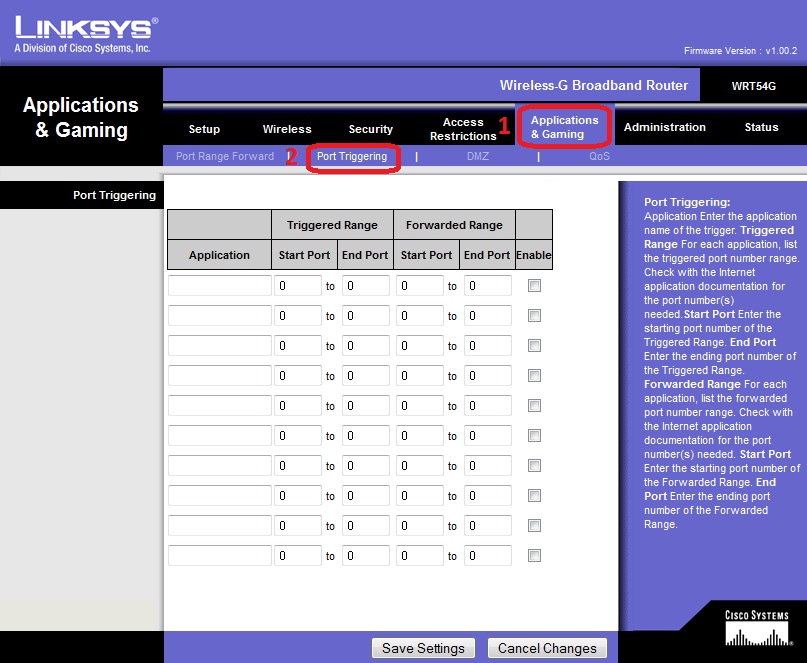
- Once at the Port Triggering page, enter in the following values and then press Save Settings at the bottom of the page.
Port 88 (UDP)
Port 3074(UDP and TCP)
Port 53 (UDP and TCP)
Port 500 (UDP)
Port 3544 (UDP)
Port UDP 4500 (UDP) - Port Triggering should now be enabled on the Linksys router. You will probably need to wait a few moments for the router to update and the settings to take affect. If you are still seeing a NAT issue please see our Alternate Method (Port Forwarding).
Alternate Method (Port Forwarding)
To setup Port Forwarding, there are two main parts that must be done. The first which is covered below is to set the Xbox One up with a static IP. The second is actually setting up your router with Port Forwarding.
NOTE: By enabling a static IP on your Xbox One, you may run into connectivity issues when attempting to connect to the internet at different locations. If you do run into connectivity issues in other locations, you will need to disable the static IP.
Part 1. Enabling a static IP on your Xbox One
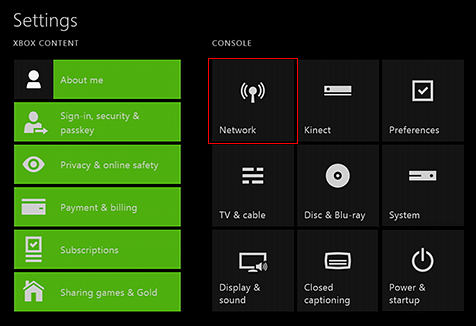
- From the Xbox Home press the Menu button on your Xbox One Controller.
- Select Settings then select Network
- Select Advanced Settings and then IP settings. From here you will need to select Manual. Once you have done this you need to enter a IP address that no other device on your home network is getting. You will also need to fill out the Subnet Mask and Default Gateway.
NOTE: These settings may very depending on the brand of router you own, but the following settings work for Comtrend and Linksys.- Once that has been done you need to select DNS Settings and set those to manual. You will want to set your Primary DNS server to 24.225.5.2. You will set the Secondary DNS server to 24.225.0.1.
NOTE: If you are not a Nex-Tech subscriber you will need to contact your ISP for DNS settings.- Once you have the information above entered you will press B on your controller to save.
- Now that the Xbox has a static IP, we will need to configure the router for Port Forwarding.
Choose your brand of Router:
Part 2. Setting up Port Forwarding on your Comtrend router
- You will need to open a internet browser(Chrome, Firefox, Internet Explorer) and in your address bar remove what address is there and type in 192.168.1.1.
- You should see a pop up asking for a username and a password. This will indicate a connection to the router. In the User Name field you will type in user and the Password will also be user.
Username: root Password: central
Username: root Password: 12345
Username: support Password: support
- At this point we should be logged into the router. We are going to now setup Port Triggering. You will need to click on Advanced Setup on the left side of the page. Then you will need to click on NAT.
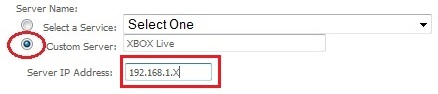
- On the main section of the page, select the correct User Interface (ex. PPPoE), Custom Server and type in Xbox Live. Then type in your static IP used on the Xbox 360 in to the Server IP Address. If you followed the previous steps, we used 192.168.1.115.
- Finally, enter the following values in to the table. Once finished, press Save/Apply at the bottom of the page. Once you select Xbox Live you will notice that it will automatically add some of these values. We need to add a few more for Xbox One.
Port 88 (UDP)
Port 3074(UDP and TCP)
Port 53 (UDP and TCP)
Port 500 (UDP)
Port 3544 (UDP)
Port UDP 4500 (UDP)- Port Forwarding should now be set up in your Xbox One and Comtrend. You may need to wait a couple of minutes for the Comtrend to save the settings and take affect. If you are still getting the NAT Error, please call our Help Desk at 888-565-3200.
Part 2. Setting up Port Forwarding on your Linksys router
- You will need to open a internet browser(Chrome, Firefox, Internet Explorer) and in your address bar remove what address is there and type in 192.168.1.1.
- Next you should see a pop up asking for a username and password. This will indicate a connection to the router. We will skip the User name field and in the Password field you will type in admin. This is the default login for a Linksys router, unless you have manually changed it, then press OK.
- Once in the Linksys router you will need to click on Applications & Gaming at the top and then Port Forwarding in the sub-menu.
- Enter the following information in the Port Range. Once completed, press Save Settings at the bottom of the page.
Port 88 (UDP)
Port 3074(UDP and TCP)
Port 53 (UDP and TCP)
Port 500 (UDP)
Port 3544 (UDP)
Port UDP 4500 (UDP)- Port Forwarding should now be set up in your Xbox One and Linksys. You may need to wait a couple of minutes for the Linksys to save the settings and take affect. If you are still getting the NAT Error, please call our Help Desk at 888-565-3200.
How to set up a DMZ for your Xbox One router
A Demilitarised Zone, or DMZ by it’s more familiar term, is a security protocol that puts a particular device – in this case your Xbox One – outside of the boundaries of the router, in essence unblocking every port rather than just game-specific ones. While using this on your PC would make it vulnerable to external attacks – such as viruses – using it on your Xbox One won’t be problematic, though using DMZ is more of an extreme fix if you’re having consistent connection problems.
1. First you’ll need to find out what the IP address of your Xbox One is. Go into the Advanced Settings from the main Networks Settings menu. Here you’ll see a list of numbers on the right-hand side, with the console’s IP address. Note this down, you’ll need this later.
2. Now access your router. This time you are looking for the term ‘DMZ’, which is often located within other menus to do with your router’s security or firewall details. It may also appear as ‘DMZ Host’ somewhere in the router menus.
3. In the DMZ option you’ll need to specify which device the DMZ will be added to, in this case, your Xbox One. Enter the IP address of the Xbox One that you noted down earlier and then enable the DMZ – now your Xbox One is free of restrictions.