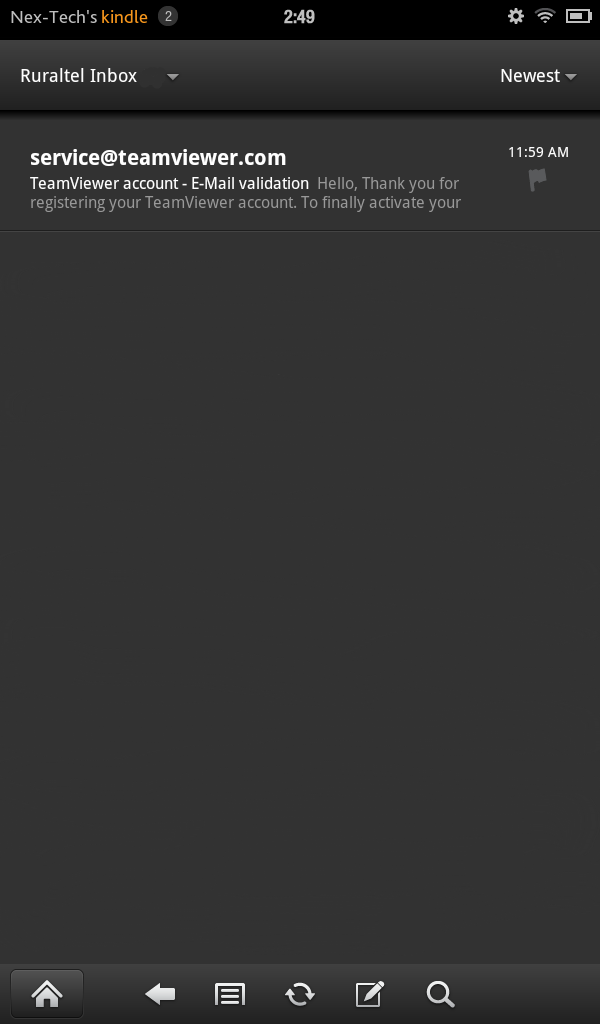
Amazon Kindle Fire - E-mail Setup
E-mail setup on Amazon Kindle Fire
DISCLAIMER: These guides are intended for Nex-Tech customers. Technical support is only provided to customers who have Nex-Tech services.
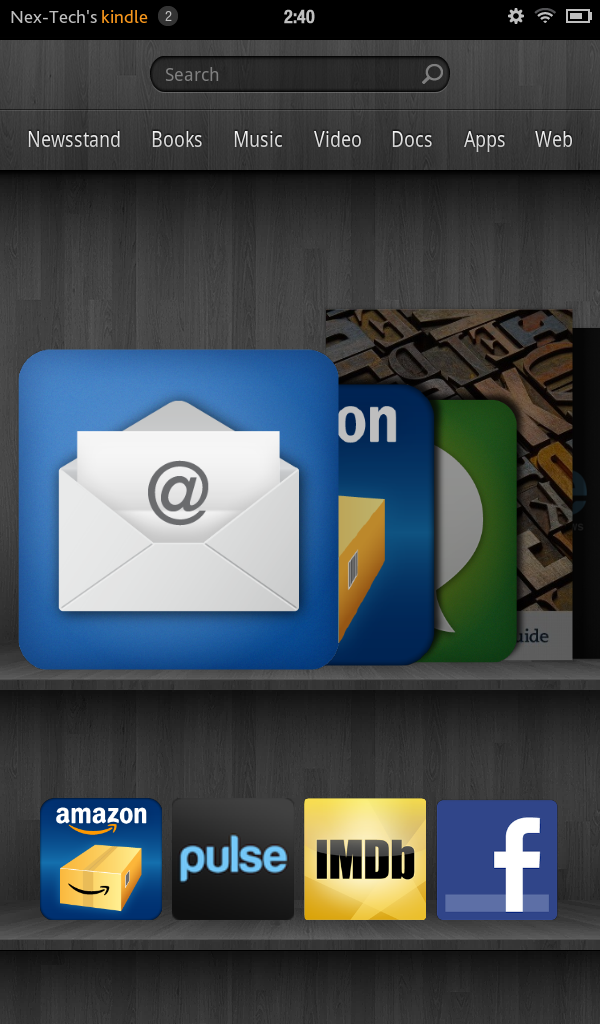
- Tap the e-mail icon to open the e-mail application.
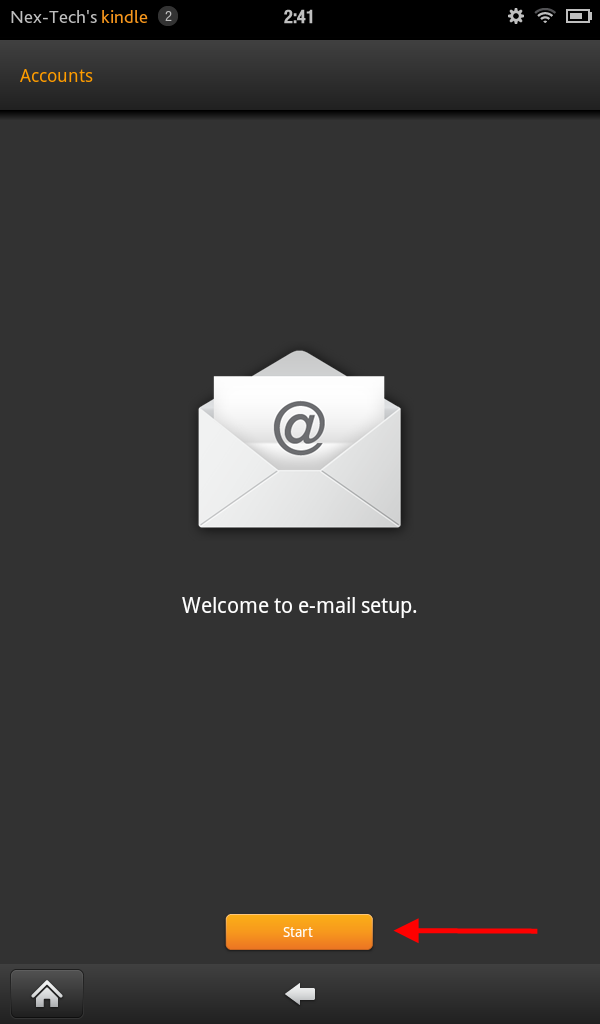
- You will see the Welcome to e-mail setup screen. Tap on the Start button at the bottom of the screen.
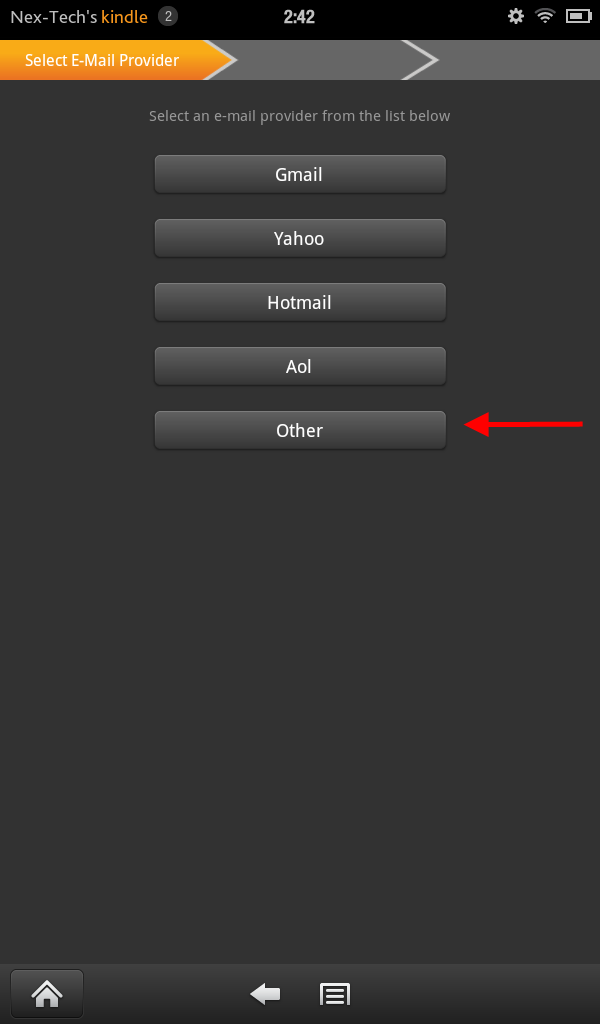
- This will bring us to the Select E-mail Provider screen. Tap on Other at the bottom of the list.
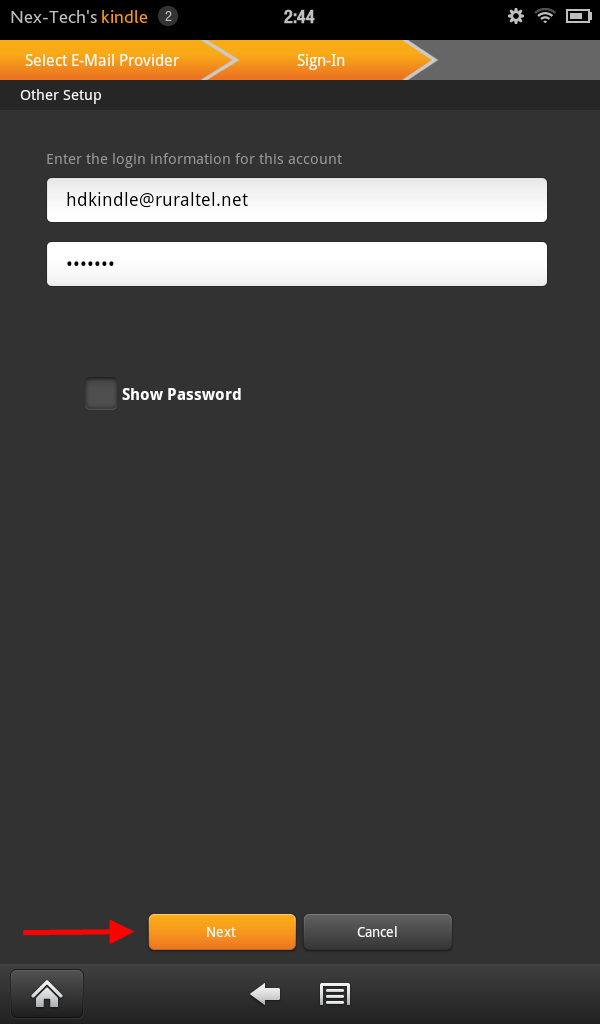
- This will bring us to the enter your username and password. (The username is the entire e-mail address) After entering in this information tap next at the bottom of the screen.
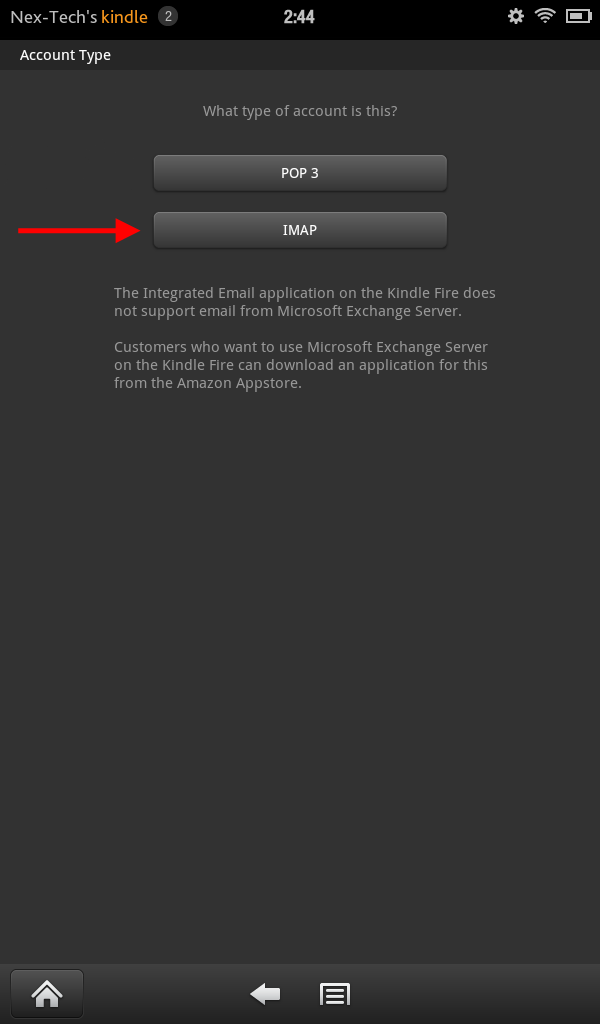
- Then we will see the account type screen. Tap on the IMAP option.
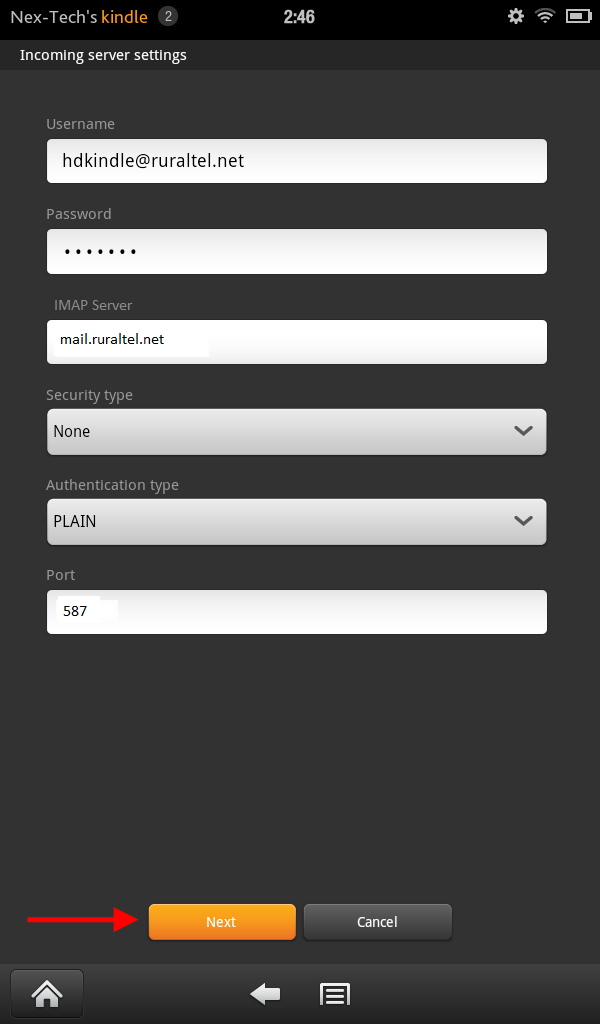
- This will bring us to the Incoming server settings screen. ***We will need to correct the preset settings from the screenshot seen below***
***We will want to correct the settings so that it looks like the screenshot below***
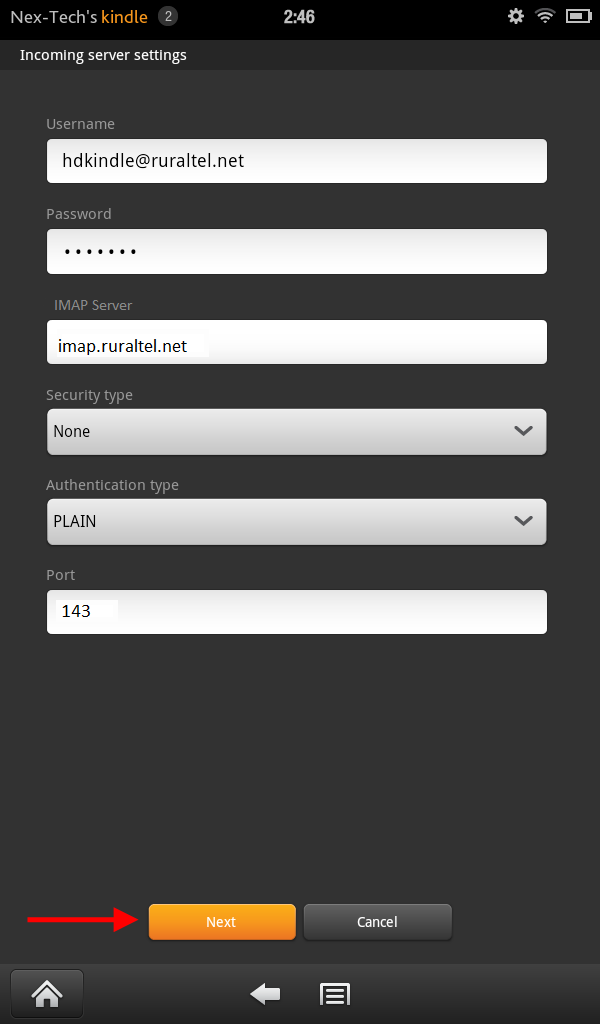
Tap the Next button when you are finished changing the settings. - Next we will see the Outgoing server settings screen as seen below. Again, we will need to make corrections to these settings.
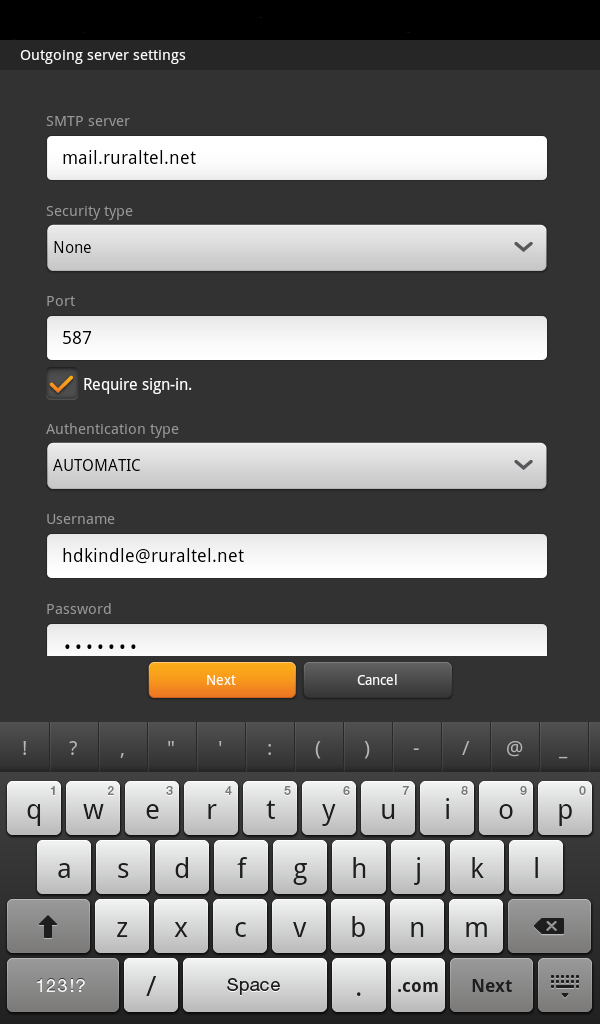
Here is what the outgoing mail server settings screen should look like.
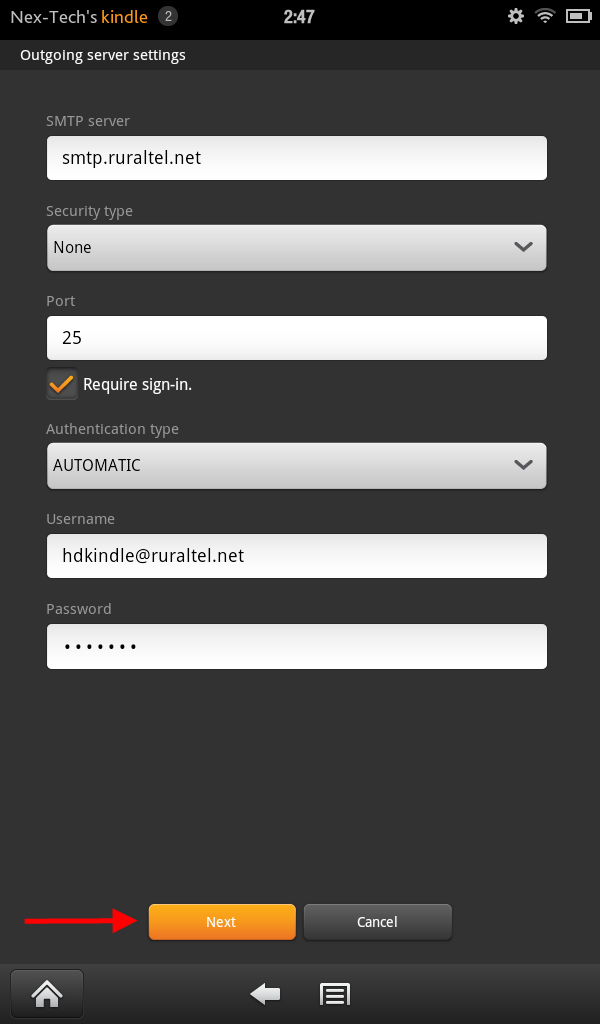
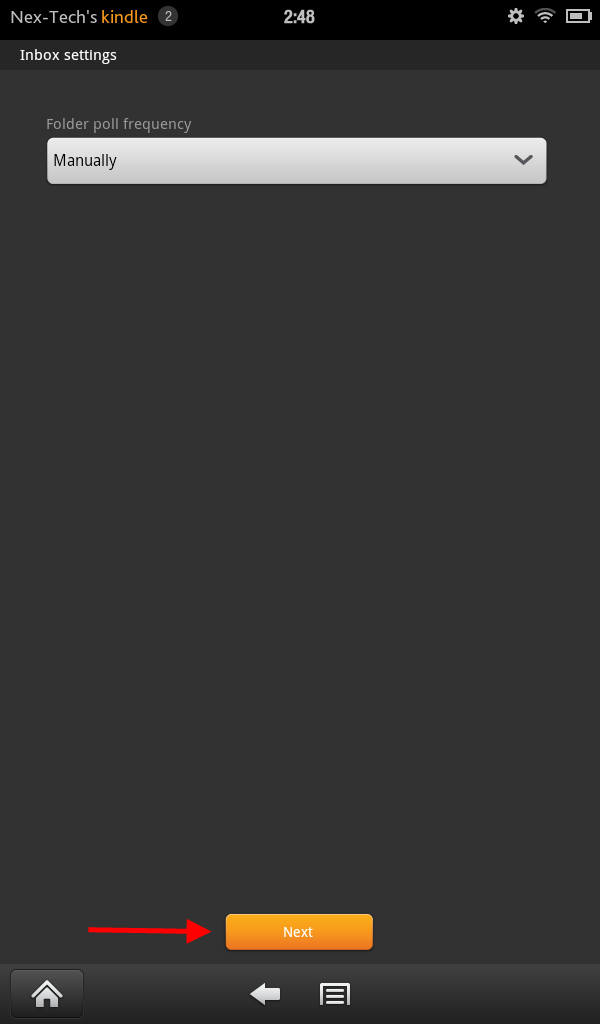
Click the Next button on the bottom after correcting settings. - This will bring us to the Inbox settings screen. Leave the Folder poll frequency setting to Manually as seen below. Then tap the Next button at the bottom of the screen.
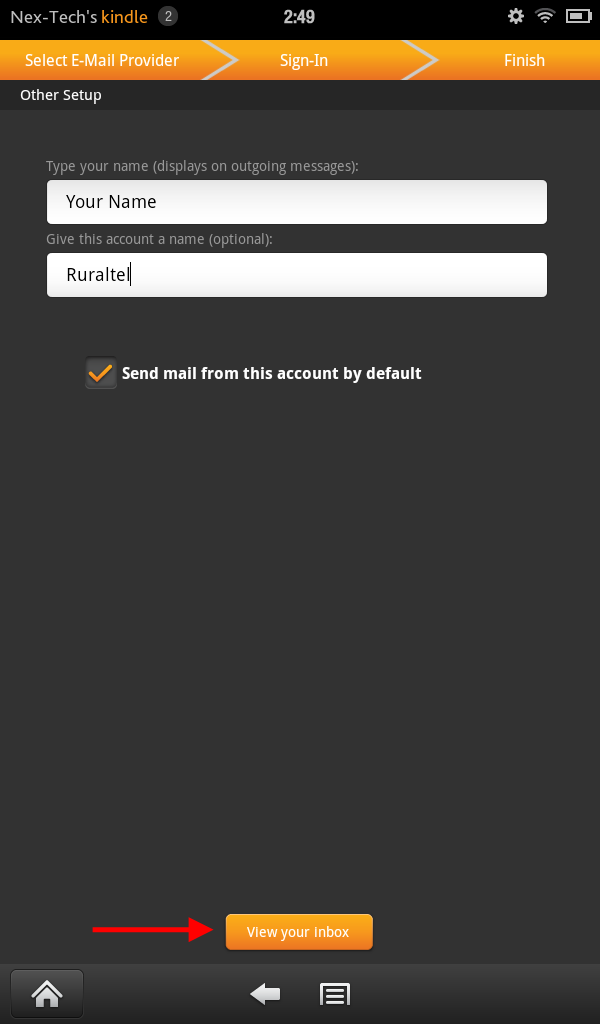
- This will take us to the Other Setup screen. Type in your name on the top box as you would like it to appear on outgoing messages. Then type in Ruraltel for the account name as seen below. Tap the View your inbox button at the bottom of the screen once you are finished.
- Finally this should take us to your inbox screen that will download any messages pending on the server. The e-mail setup is complete.
