iOS Automatic Email Setup
iOS Automatic Email Setup
(iPhone, iPad, iPod)
iOS devices (iPhone, iPad, iPod) have the ability to automatically configure your email settings. Not only will it set up your email account, but it will also sync your calendar and contacts to your email account with us. This is beneficial because you can check your calendar and contacts from any computer, restore and lost information, and share the information between other devices.
-
On your Apple device, open Safari and navigate to webmail.ruraltel.net. The website will automatically detect your device and give you the option to either Download the profile or to Access webmail. Tap on Download the profile.
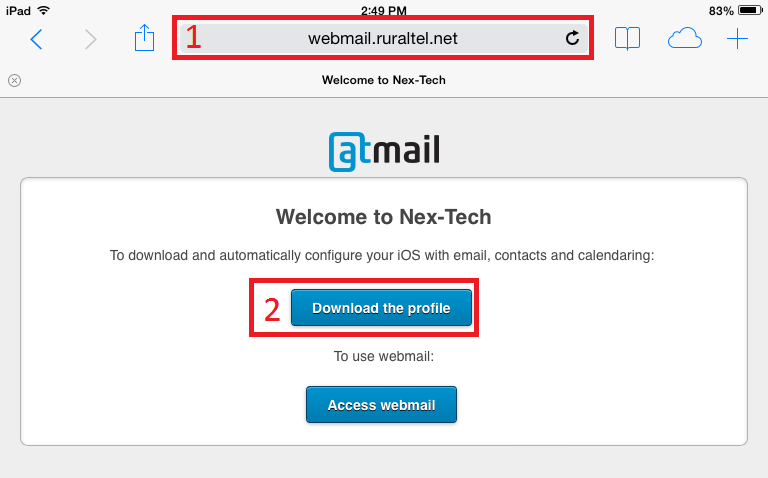
NOTE: By tapping on Access webmail, you will be logged in to your email account but it will not be set up on your Apple device for future use.
-
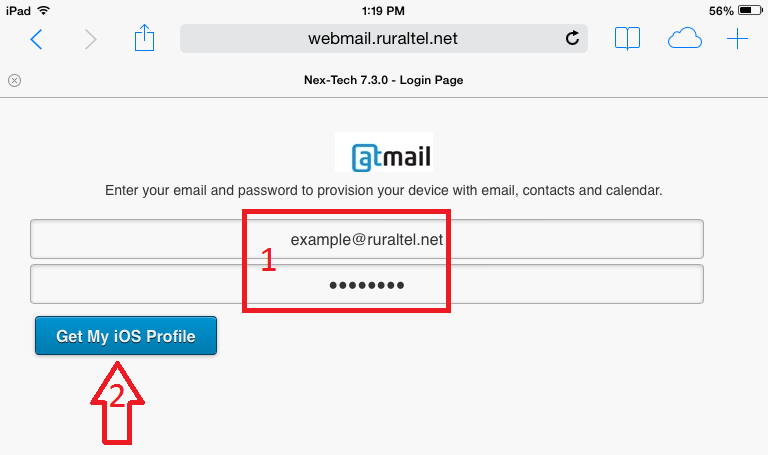
You should now have a screen that is asking to enter your Email address and Password. Once you enter those, tap Get My iOS Profile.
-
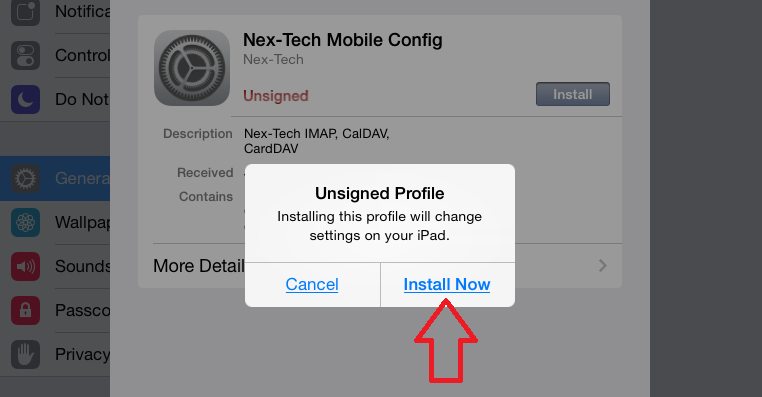
An Install Profile window should come up. Tap on Install to start the installation.
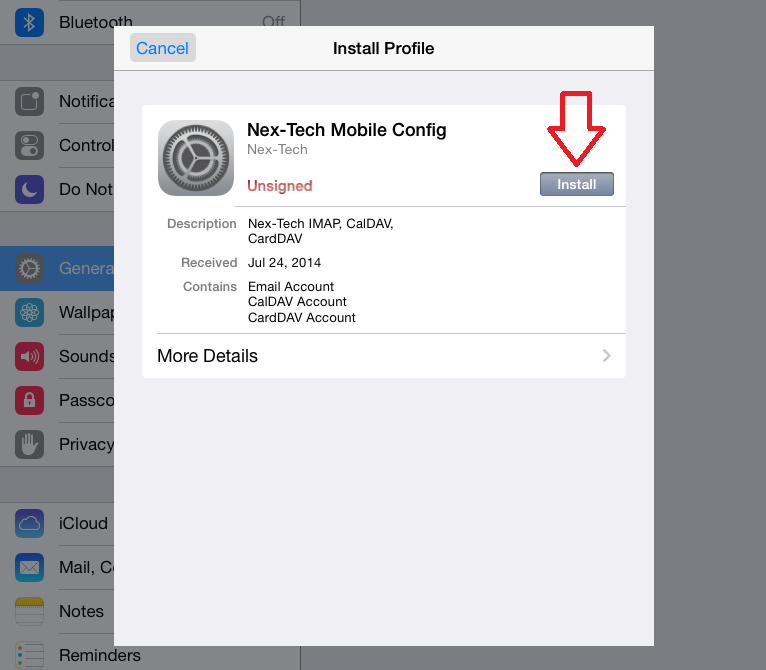
- On the Unsigned Profile box that pops up, tap Install Now.
-
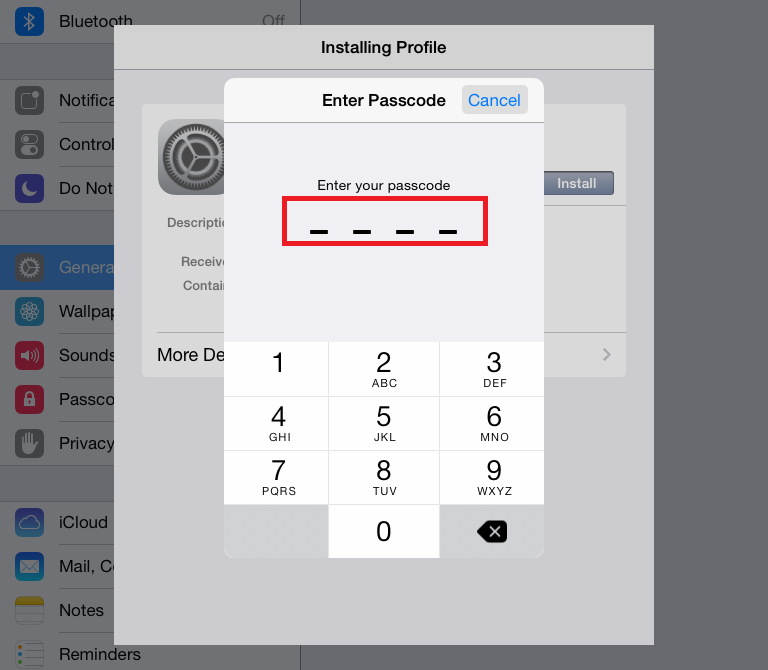
If you have a passcode set up on your Apple device, you will be prompted to enter your passcode. Enter it now. If you do not have a passcode set up, you can skip this step.
-
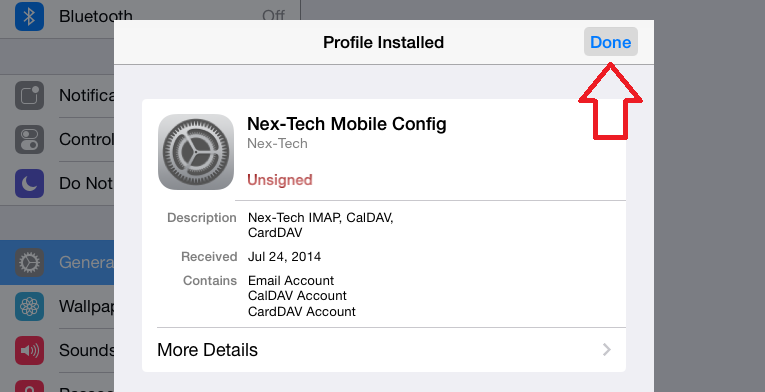
You will now have a Profile Installed window. Tap Done in the upper right.
-
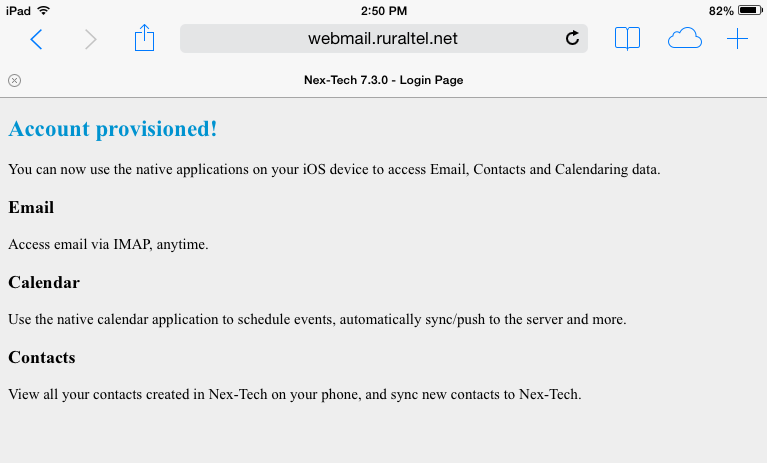
Safari will come back up to inform you the account has been successfully provisioned. Press the Home button at the bottom of the Apple device to take you back to the home screen.
- Tap on Settings.
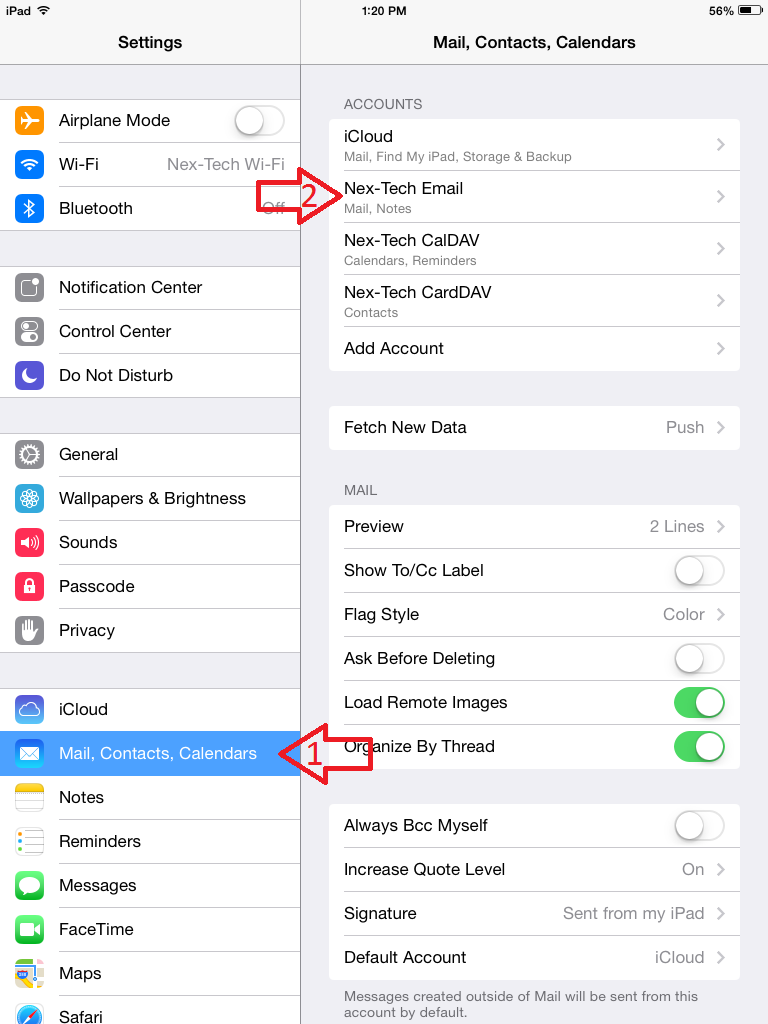
- Tap on Mail, Contacts, Calendars then tap on Nex-Tech Email.
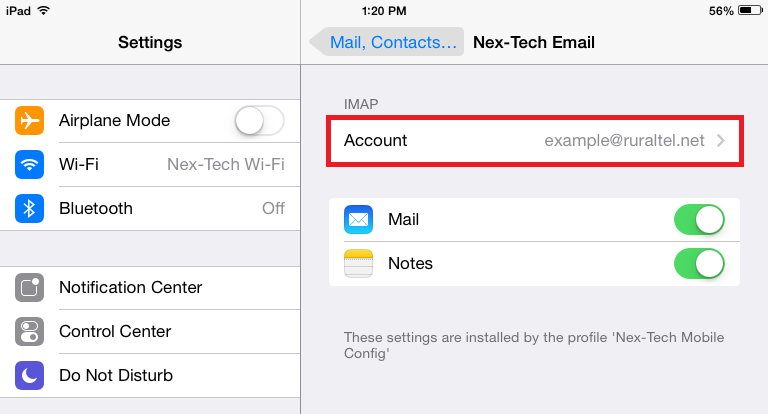
- Under IMAP, tap on Account.
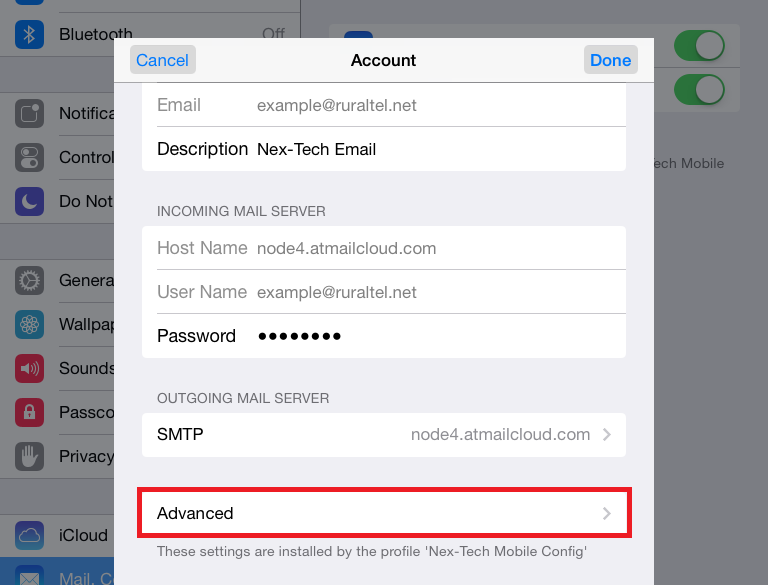
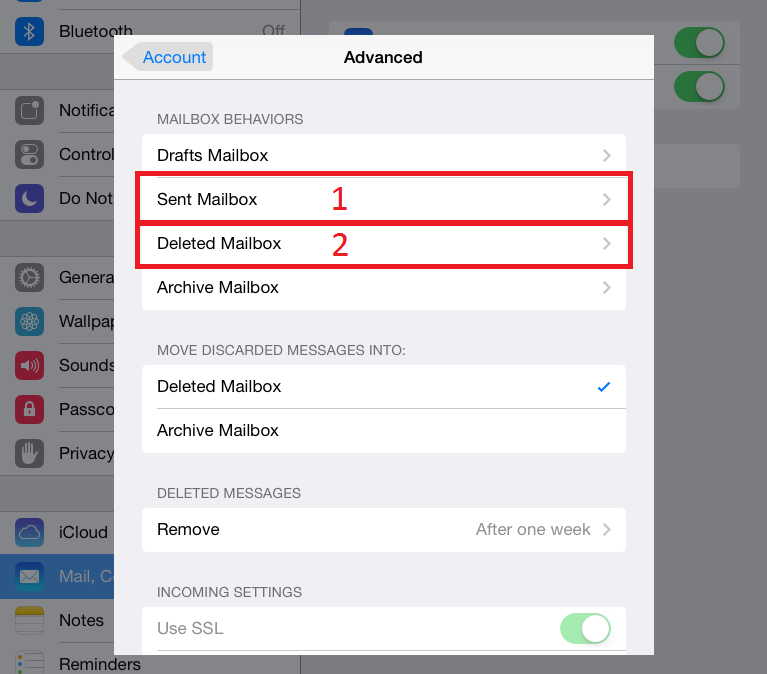
- Towards the bottom of the window, tap on Advanced.
-
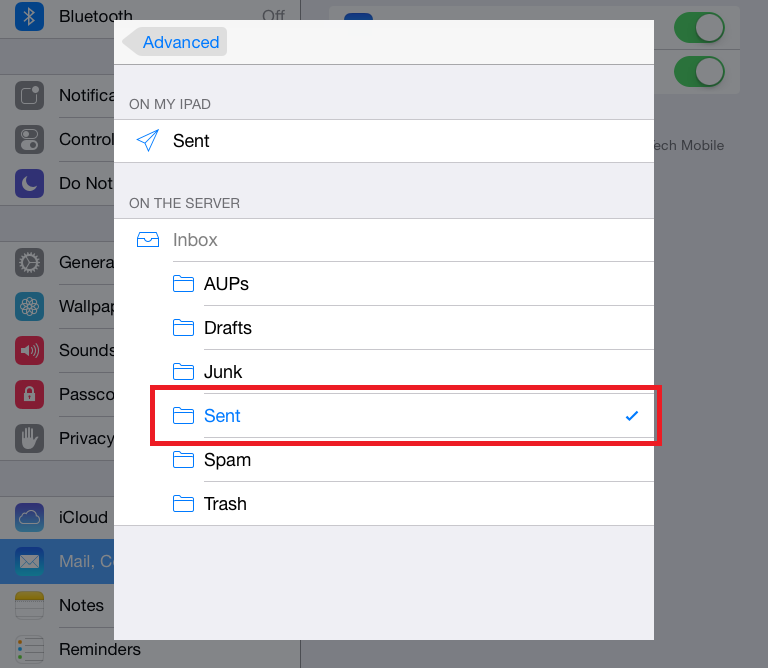
Under MAILBOX BEHAVIORS, tap on Sent Mailbox. Then under ON THE SERVER, tap on Sent. Now tap on the Advanced back arrow at the top left to take you back to the previous screen.
-
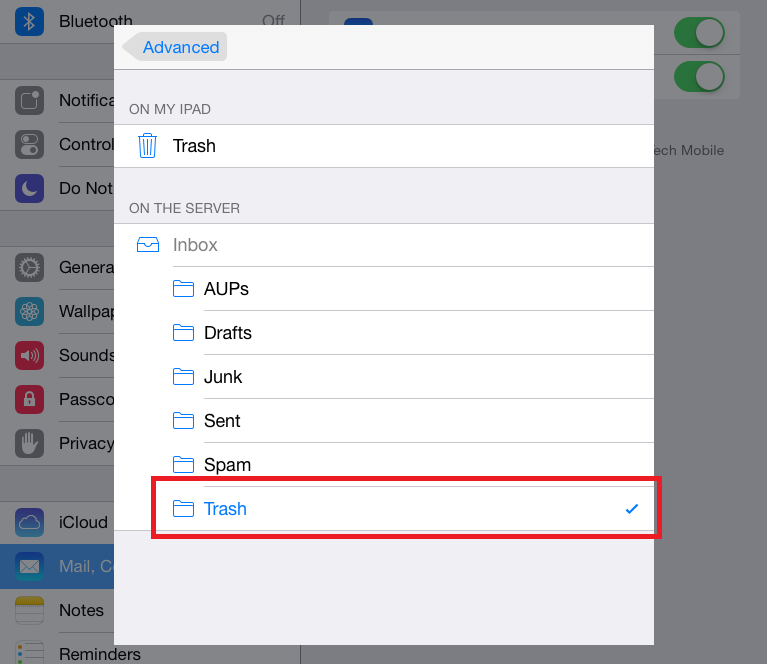
Now under MAILBOX BEHAVIORS, tap on Deleted Mailbox. Now under ON THE SERVER, tap on Trash. Now tap on the Advanced back arrow at the top left to take you back to the previous screen. Now tap the Account back arrow at the top left to take you back to the Account screen. Now hit Done at the top right.
Press the home button at the bottom of the Apple device to take you back to the home screen. Now tap on Mail. Your Nex-Tech email should now be setup and working properly.
To Remove the mailbox after using the Automatic Set up feature.
If you want to remove an email account after using the Automatic option you will find that option under profiles as calDAV profile, rather than under Mail, Contacts, Calendars as you would expect.
On your iOS device, go to Settings->General->Profiles and then delete calDAV Mail, Contacts and Calendars profiles