Windows Vista - File Sharing
First Things First...
Setting the Workgroup Name
For easier and faster discovery of computers on your home network, it is highly recommended that all computers on a home network be configured for the same workgroup name. If computers are in multiple workgroups, it can take additional time and effort to discover all of the computers on the network.
The workgroup name in Windows Vista
To configure the workgroup name for a computer running Windows Vista:
- First, click on Start -->Control Panel
-
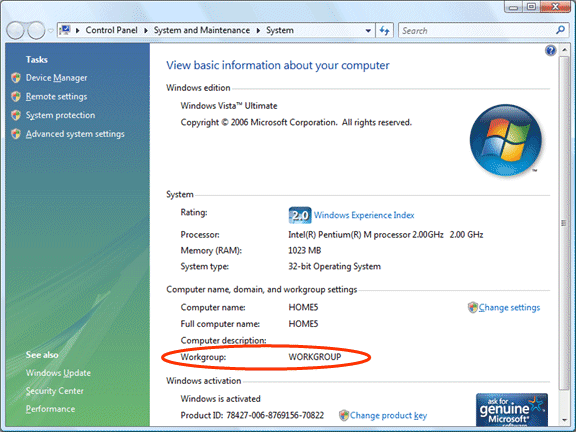
In the Computer name, domain, and workgroup settings section of the System window, click Change settings.
-
On the Computer Name tab of the System Properties dialog box, click Change.
-
In the Computer Name/Domain Changes dialog box, type the name of the workgroup being used by the other computers on your network in Workgroup, and then click OK.
-
When you are prompted with a welcome message box, click OK. When prompted with a message box to restart your computer, click OK.
-
Click Close. When prompted to restart the computer, click Restart Now.
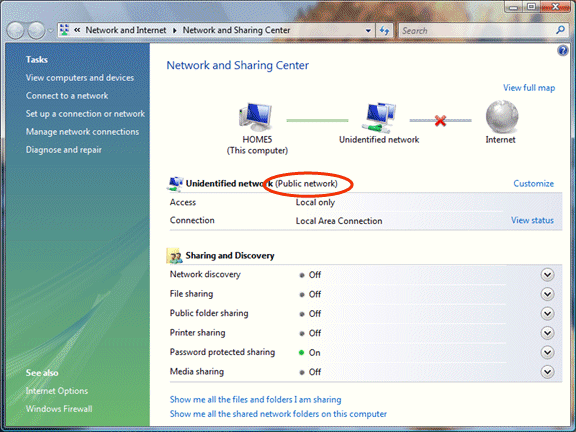
Preferably, the average customer should be in a private network to be more secure to outsiders, if your network type is Public, do the following:
1. To the right of the network name and location type, click Customize.
2. In the Set Network Location dialog box, click Private, and then click Next.
3. In the Successfully set network settings dialog box, click Close.
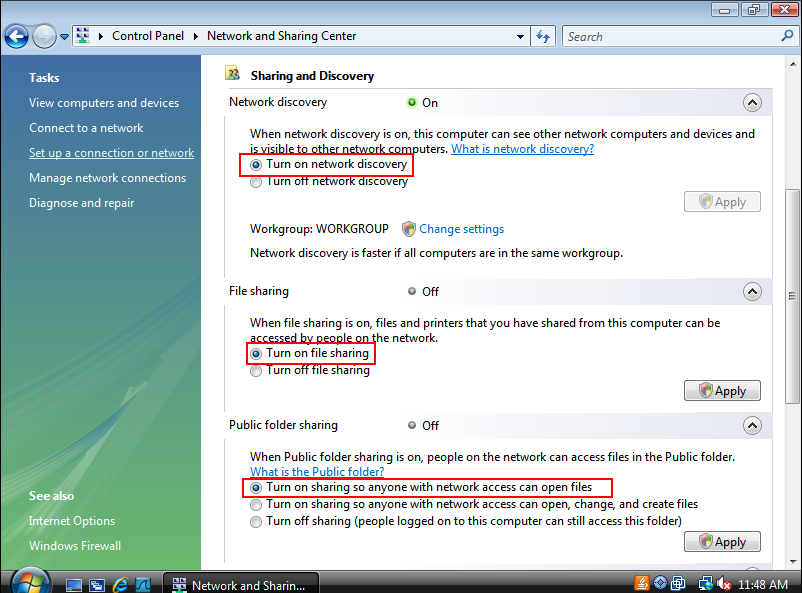
Enabling File and Printer Sharing Options
By changing your network location type to private, network discovery is automatically enabled in the Sharing and Discovery section of the Network and Sharing Center window. The following additional file and printer sharing options must be manually enabled:
- File sharing
- Public folder sharing
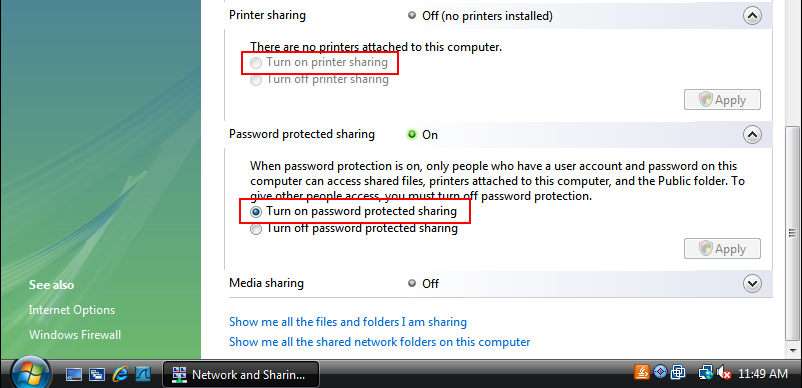
- Printer sharing
- Password protected sharing
When all of these sharing and discovery options are enabled, your computer can:
- Locate other computers and devices on your home network and have other computers locate your computer
- Share its folders
- Share its Public folder
- Share its printers
- Require user names and passwords for other computers that connect to the shared folders and printers of this computer
How to Manually Turn on File Sharing
- First click on Start button located in your taskbar, then choose Control Panel.
- At the top right in the Search bar, type in network. In the middle then choose Network and Sharing Center.
- Located in the middle of your Network and Sharing Center are your Sharing and Discovery Options, each can be turned on or off at any chosen time.
- To change the settings of one of the listed items, simply click on the down arrow on the right hand side. This will drop down additional options.
Once all of the above options have been enabled, you are now ready to choose which specific folder or drive you are going to share.
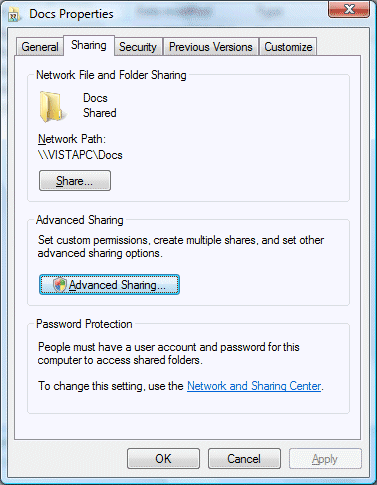
- First, right click on the specified folder you would like to share, and choose Properties.
- In the Properties window, we need to click on the Sharing tab at the top, then choose Advanced Sharing in the middle.
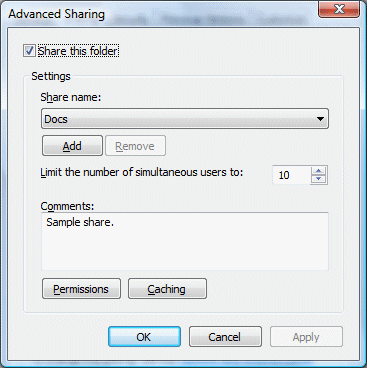
- In the Advanced Sharing windows, put a check in the box at the top that states Share this folder.
- You can change the Share name: if you would like, but I would recommend to most users to leave as is.
- You can also change the permissions to this folder, most of the time if you are just sharing files you want to leave permissions at Read Only.
- Once all permissions are set, click on OK, then Apply then Close.