Resizing Images
Resizing Images using Paint.net
- The first step in this process is to download and install Paint.net if the customer does not already have it on their computer, a link to download the program is located here.
- Once Paint.net has been properly installed, we are ready to use the program. If the program is not already open, you will be able to locate it either in your Program Files in Windows XP or with Vista and Windows Seven simply click on the start button, do a search for Paint.net, then open the program.
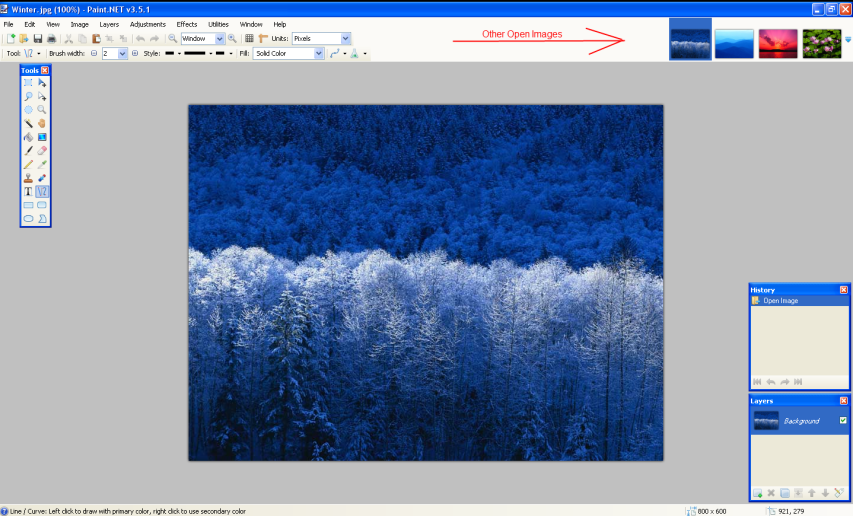
- To get started, click on File then choose Open. Browse to the location where you have all your pictures that need edited saved at, you may open multiple images at once with Paint.net, to do this either use the Shift key to select the First, last and everything in between. Or use the Ctrl key to select multiple images not in a row. Once all files have been highlighted, click on Open at the bottom right of the window. Once all you images have opened up, you can browse through them at any point in time, they are in a slideshow form location at the top right of the window.
- To resize an Image, click on Image at the top, then choose Resize... (You can also get to the image resize by pressing Ctrl+R)
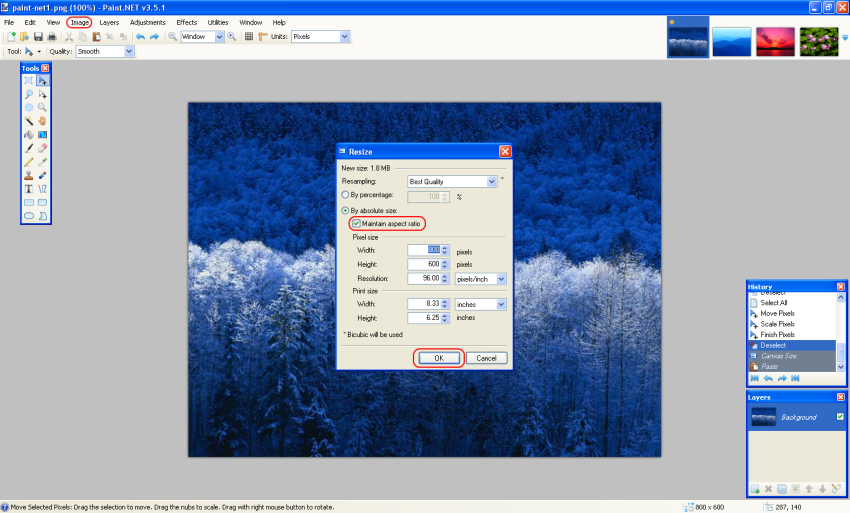
- Once open, we can now adjust the overall size of our image, if you are wanting to resize a picture for email purposes, its probably best to size the image down quite a bit so it sends with no problems.
- The overall size of the image is located at the top left of the window.
- Maintain aspect ratio should have a check in its box, this will help to keep the image from becoming distorted when resizing. When finished, click on OK at the bottom.
- Your image is now resized, to save the image click on File at the top left then choose either Save or Save As...
- You will need to repeat these steps for each individual image you want to resize.
Resizing Multiple Images at once using Image Resizer
- When multiple images need to be resized, it can take a very long time doing them one by one. The Image Resizer Utility lets you select mutliple pictures at once and also resize those images while leaving the origional picture as is. You can download and install this program here. This program should work on most Operating Systems.
- Once the program has been properly installed on the machine, you will be able to locate it either in your Program Files in Windows XP or with Vista and Windows Seven simply click on the start button, and do a search for Image Resizer, then open the program.
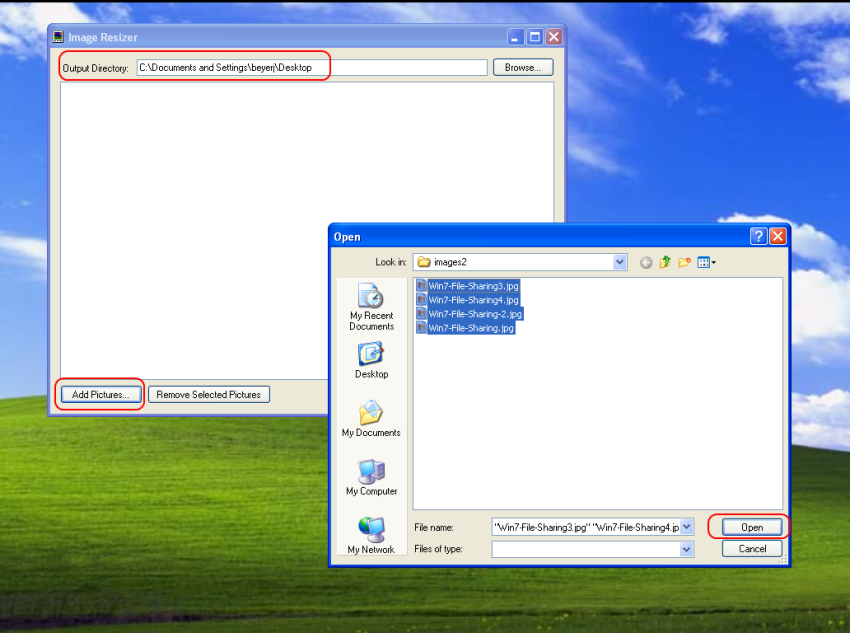
- With the program now open, we first need to choose our Output Directory. To do this, simply click on the Browse button and choose where on your computer you would like to save these new images. To add pictures to be resized simply click on the Add Pictures... button located at the bottom left of the window. Then browse to wherever the pictures are located on your computer, once you have which ever folder or images you want to edit, click on Open.
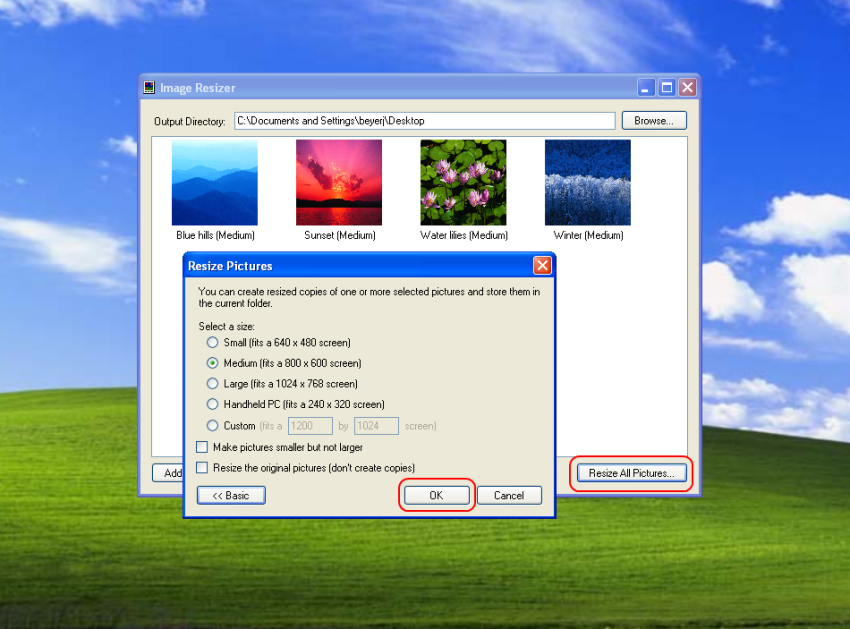
- To begin resizing the images, click on Resize All Pictures... This will open up another window where you are able to adjust the size of the new pictures, you may even enter a custom size for the picture if you know specifically what size you desire.
- Once you have your designated size chosen, click on OK at the bottom, all your pictures have now been resized and should be saved at their appropriate location.