Mac OSX 10.5 - File Sharing
Quick Reminder before beginning
- Mac OS X v10.5's firewall, firewalls on other computers, or network routers may override your file sharing settings.
- To enable and configure file sharing you will need to know the name and password of an administrator account on your Mac.
- Before you begin, you might want to create all the user and group accounts you will need in Accounts preferences.
- You can set up your Mac to allow specific user and group accounts access to certain folders with appropriate access privileges.
- You can share files using Apple Filing Protocol (AFP), File Transfer Protocol (FTP) or Server Message Block (SMB) protocol.
- File Sharing on Mac OS X is intended for up to 10 simultaneously-connected clients. If you need to connect more thatn 10 users at one time, you should upgrade to the Unlimited-Client version of Mac OS X Server (http://www.apple.com/server/).
Open Sharing preferences
- Log in with an administrator user account.
- From the Apple menu, choose System Preferences.
- From the View menu, choose Sharing.
Select folders to share
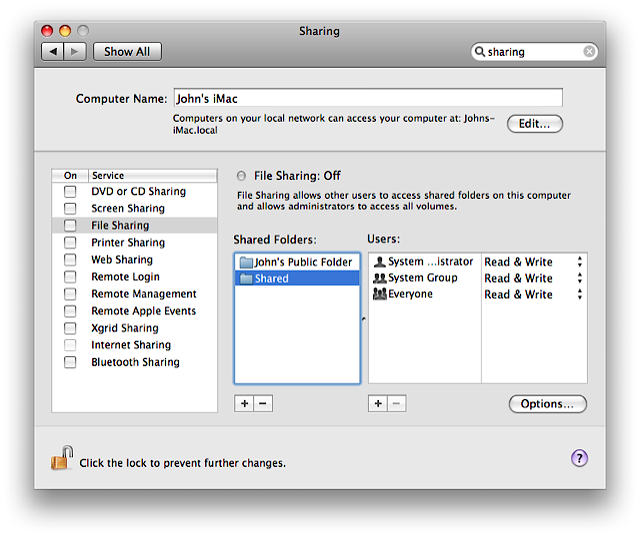
- Click the + (plus) icon below the "Shared Folders:" field. A sheet appears where you can navigate to the folder you wish to share.
- In the example below, the folders named "John's Public Folder" and "Shared" (/Users/Shared) have been selected for sharing.
- Repeat this process for all folders you wish to share.
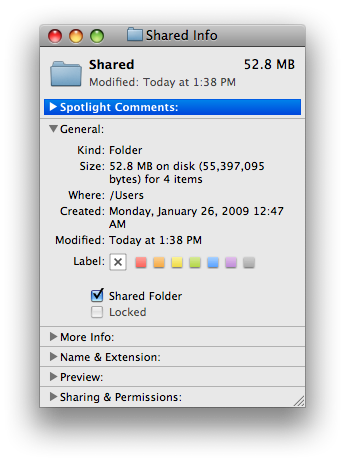
Note: You can also directly select a folder in the Finder to share. Select the folders, choose “Get Info” from the File menu, and enable "Shared Folder" to share it (or deselect "Shared Folder" to stop sharing the folder).
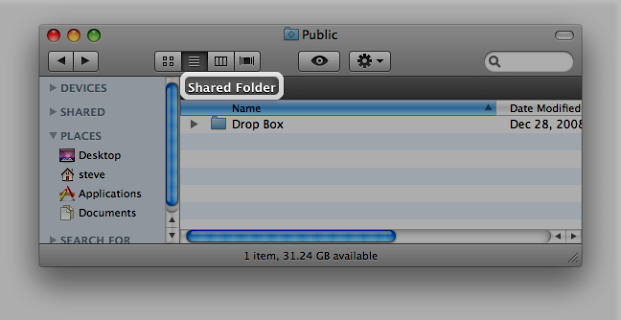
Tip: When you open a shared folder, a "Shared Folder" banner appears in its Finder window, as well as any subfolder windows.
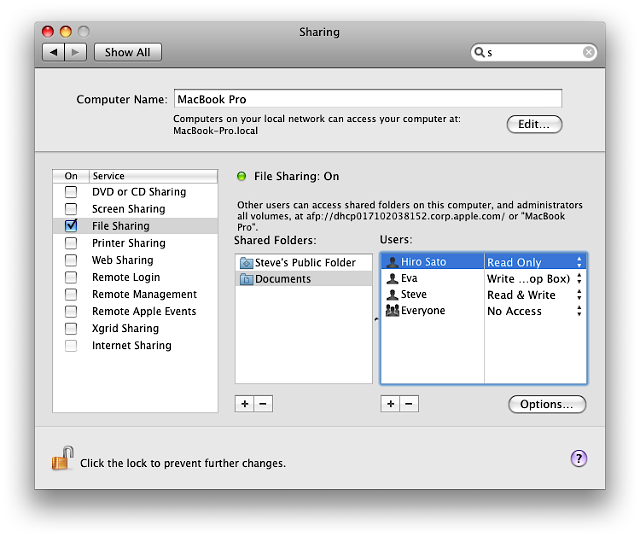
- In Sharing preferences, select the folder that's being shared.
- To add to the default user accounts and groups that were selected when you shared the folder, click the + (plus) icon below the "Users:" field.
- In the sheet that appears, select an existing user account or group (user accounts can be created in Accounts preferences, in System Preferences).
The default privilege for a user account or group you add is "Read Only". If you want to change this, from the "Read Only" pop-up menu choose one of the following privilege options:
- Read & Write- The user can read, copy, edit and delete the contents of the folder.
- Read Only- The user can only read and copy (to another location) the contents of the folder.
- Write Only (Drop Box) - The user can only copy content into the folder. The user cannot see the contents of the drop box folder.
- No Access (groups only) = User accounts in this group will have no access to the folder.
Note: Repeat this process for each folder being shared.
Follow these steps to select the appropriate protocols for the kind of computer that will log onto your Mac:
- In Sharing preferences, click the "Options..." button.
- Select "Share files and folders using AFP" to enable the Apple Filing Protocol. Use this protocol to file share with other Macs.
- Select "Share files and folders using FTP" to enable the File Transfer Protocol. Use this protocol to file share with UNIX and LINUX systems.
- Select "Share files and folders using SMB" to enable the Server Message Block protocol and check the user accounts to enable for SMB. Use this protocol to file share with Microsoft Windows-based PCs.
- Once you have selected the desired networking protocols, click "Done" to complete the process.