iOS Manual Email Setup
-
iOS IMAP Email Setup
(iPhone, iPad, iPod)
- On your Apple device, tap on Settings.
- On your Apple device, tap on Settings.
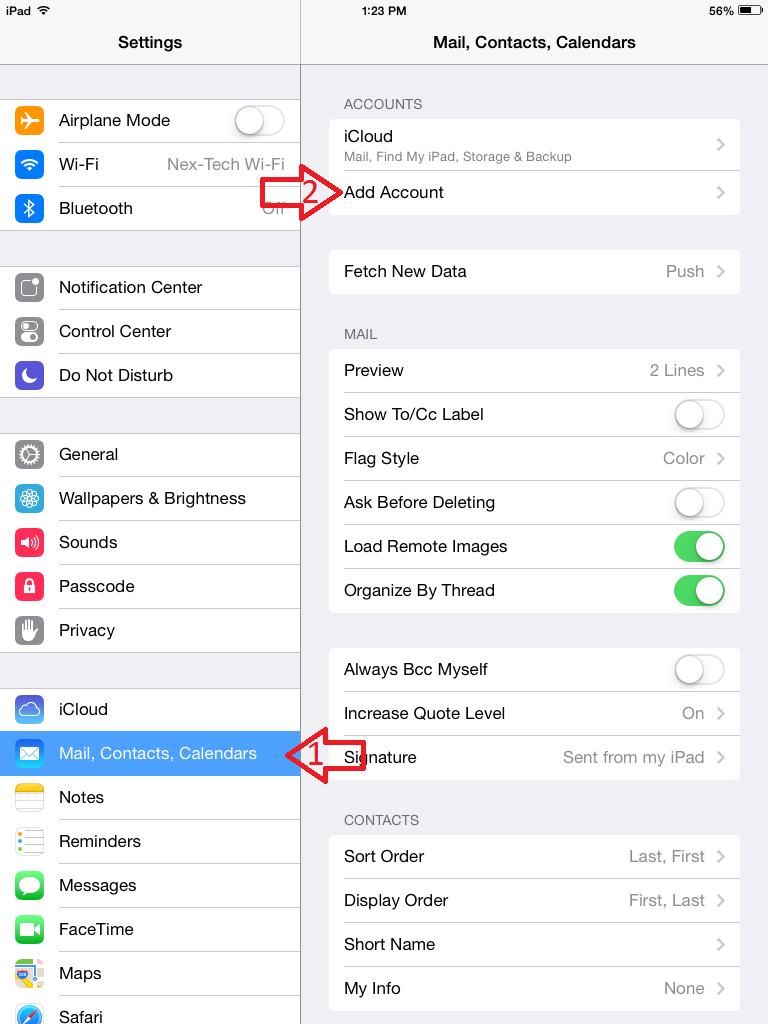
- Tap on Mail, Contacts, Calendars (Accounts and Passwords for iOS 11 and 12, back under Mail for iOS 13 and newer). Then under ACCOUNTS, tap Add Account.
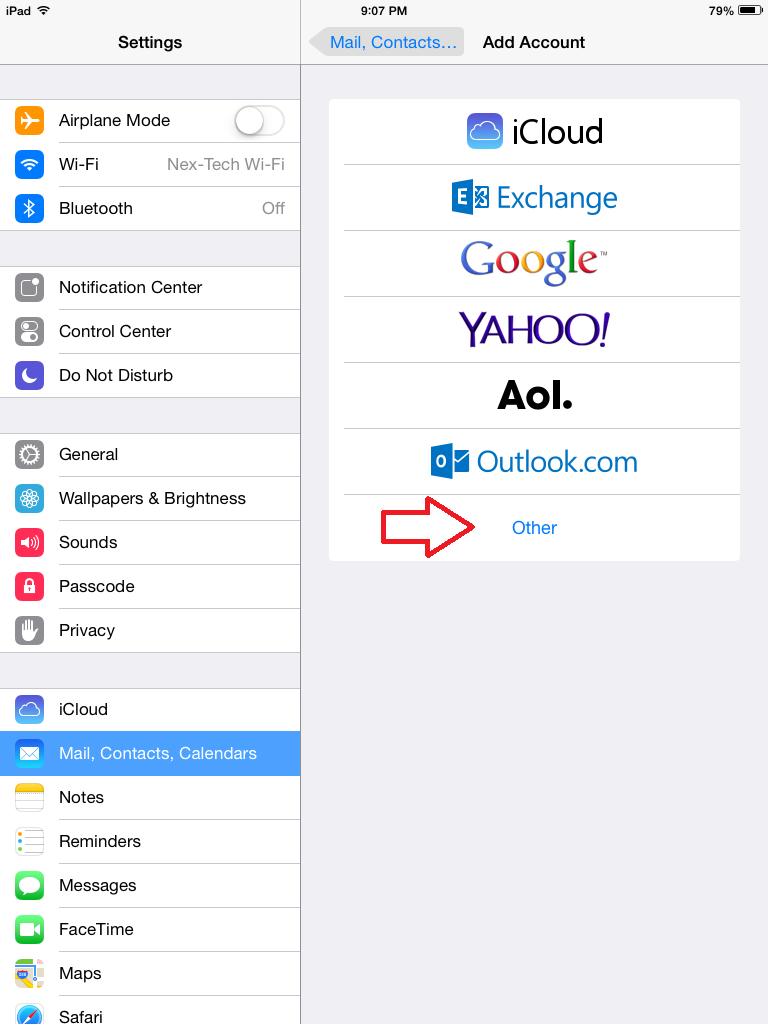
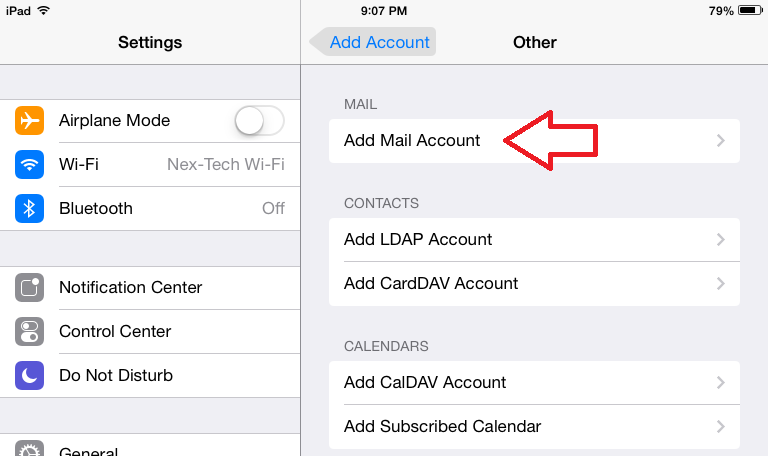
- Now tap on Other.
- Next, under MAIL tap on Add Mail Account.
-
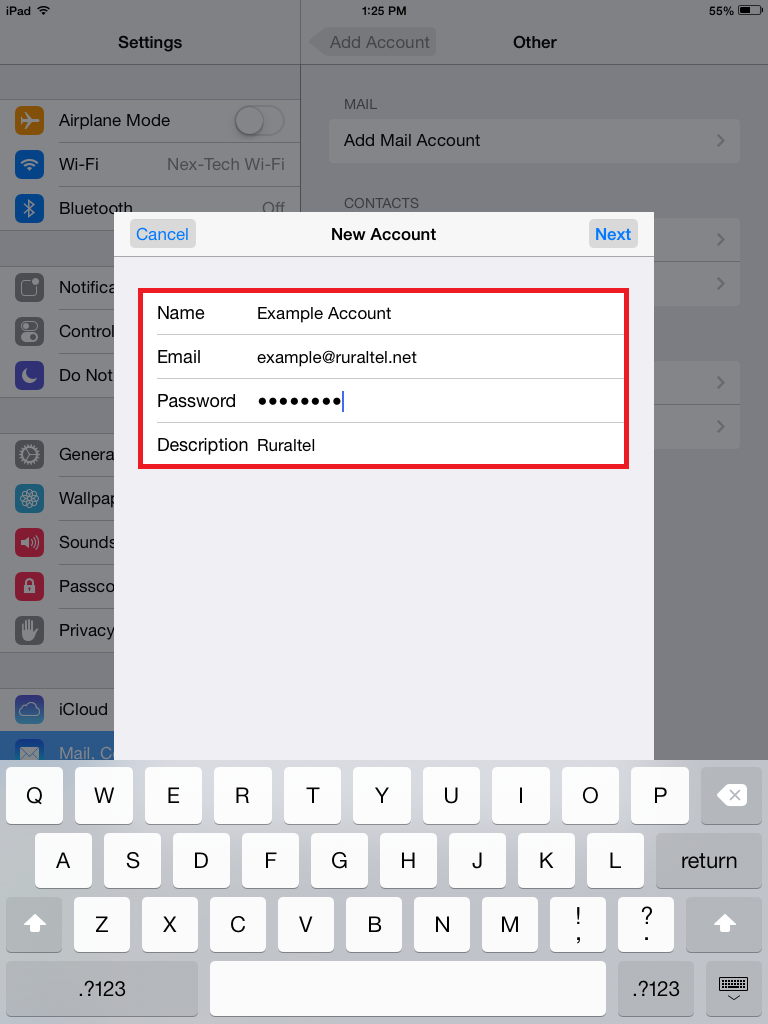
On the New Account window that comes up, fill in your Name, Email address and Password. The Description should automatically fill in. Tap Next in the upper right corner.
-
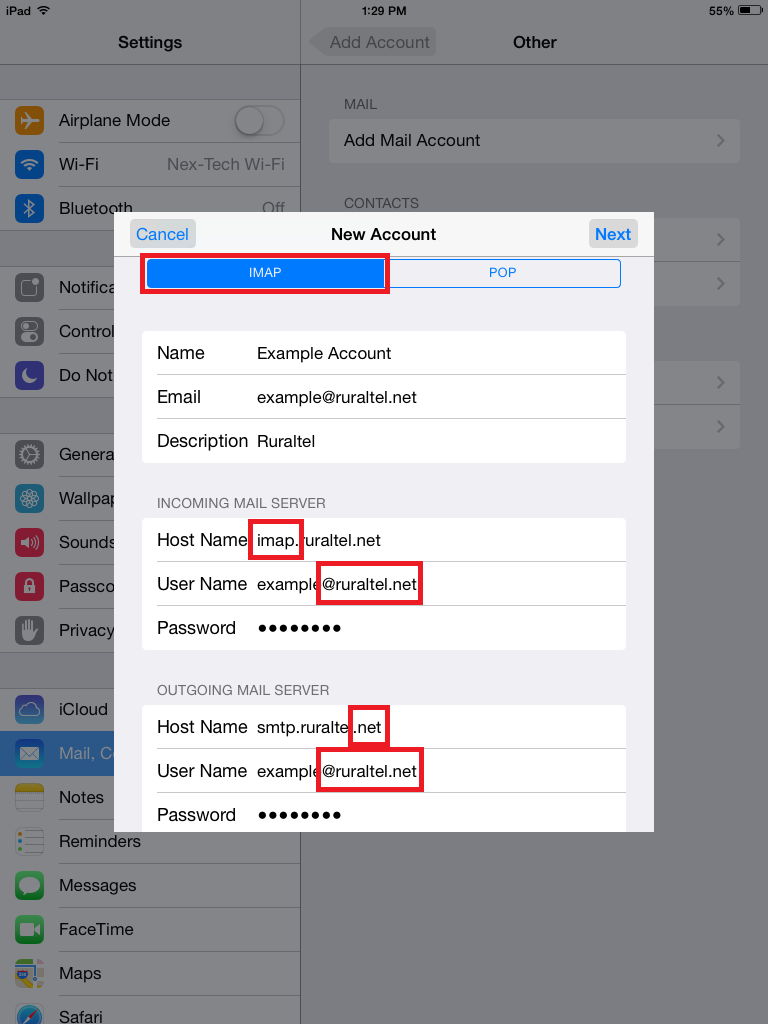
On the New Account window there are several things that will need to be changed. First, you will need to tap IMAP at the top. Next, under INCOMING MAIL SERVER you will need to change the Host Name from pop3.ruraltel.net to imap.ruraltel.net. Then, you will need to make sure the Username is your full email address. Now, under OUTGOING MAIL SERVER, you will need to change the .com on the Host Name to .net. Next, you will need to make sure the User Name is your full email address. Once these changes are complete, tap Next in the upper right corner. You will get an error message that says Cannot Get Mail. Tap on OK to close this error message.
-
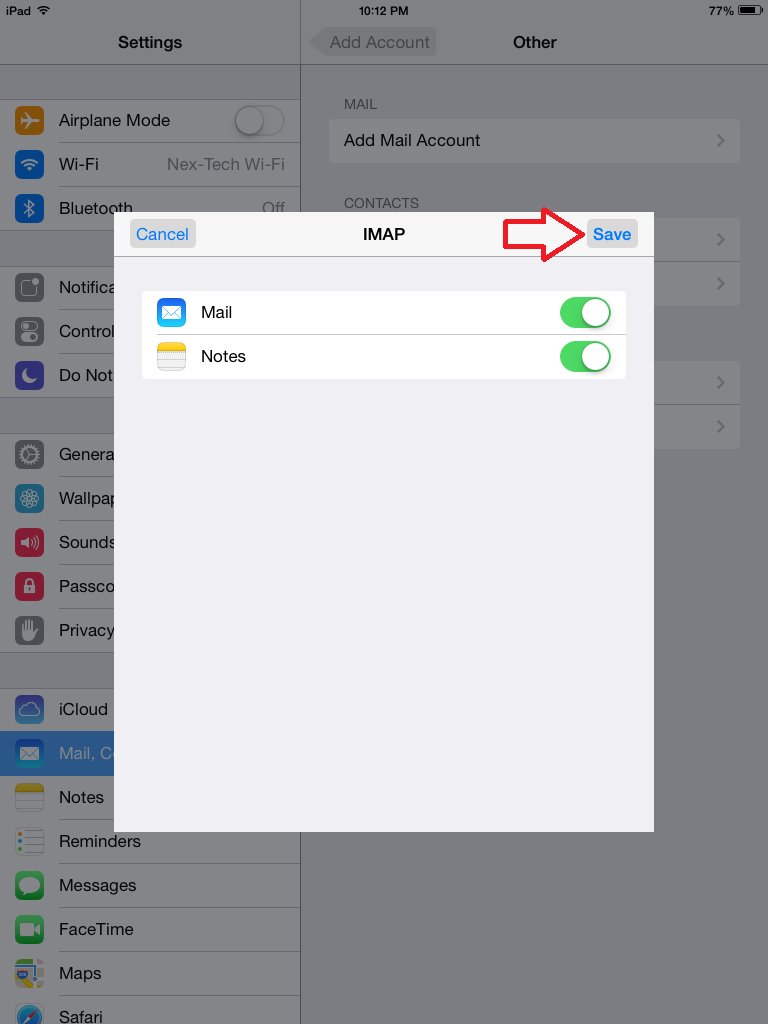
On the IMAP window, you will just need to tap Save in the upper right corner.
-
You will now be back in the settings page. Tap on the account you just created.
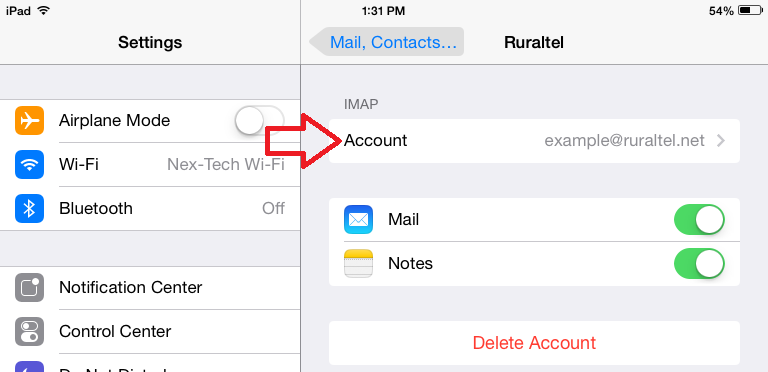
- Under IMAP, tap on Account.
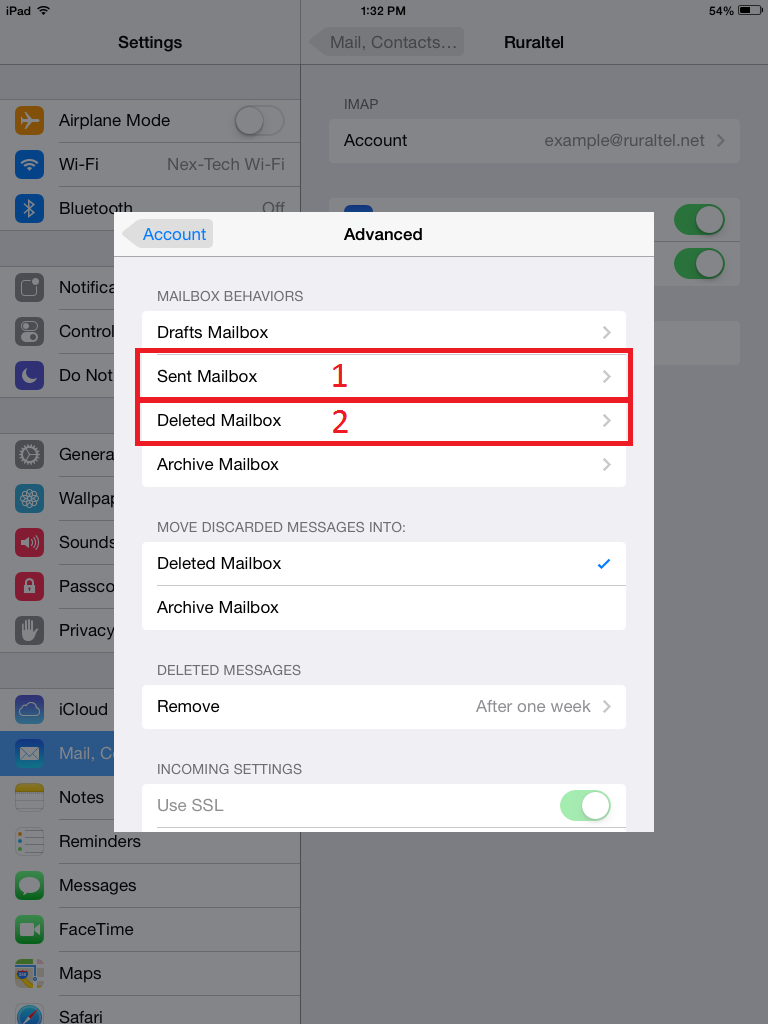
- Towards the bottom of the window, tap on Advanced.

-
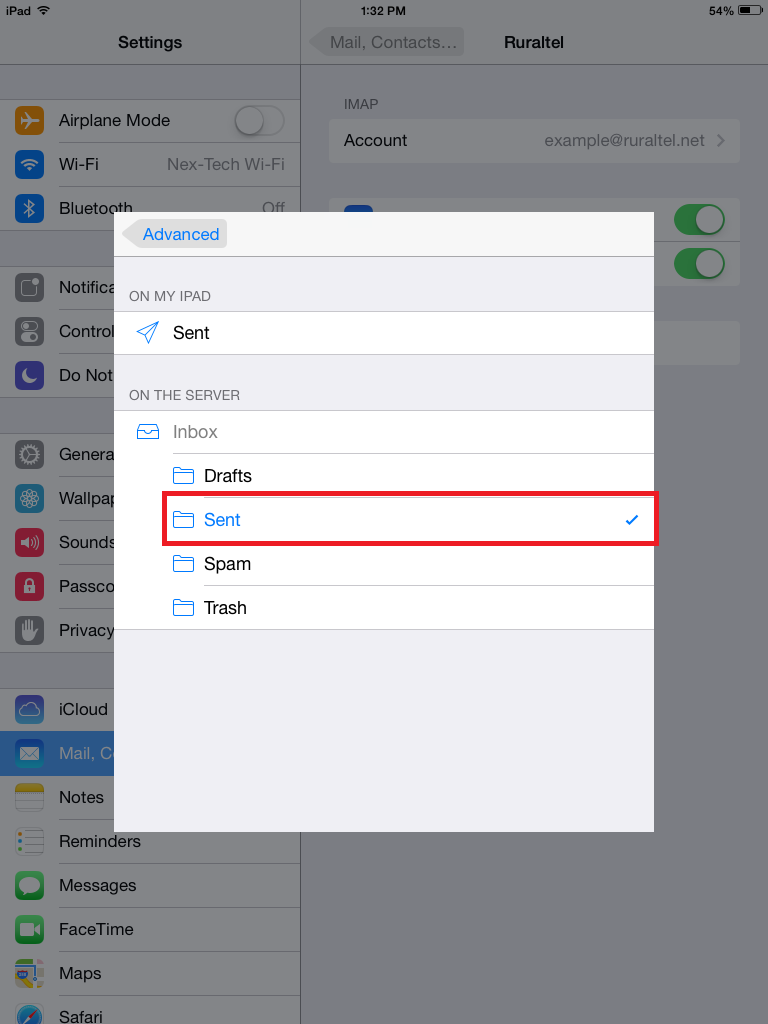
Under MAILBOX BEHAVIORS, tap on Sent Mailbox. Then under ON THE SERVER, tap on Sent. Now tap on the Advanced back arrow at the top left to take you back to the previous screen.
-
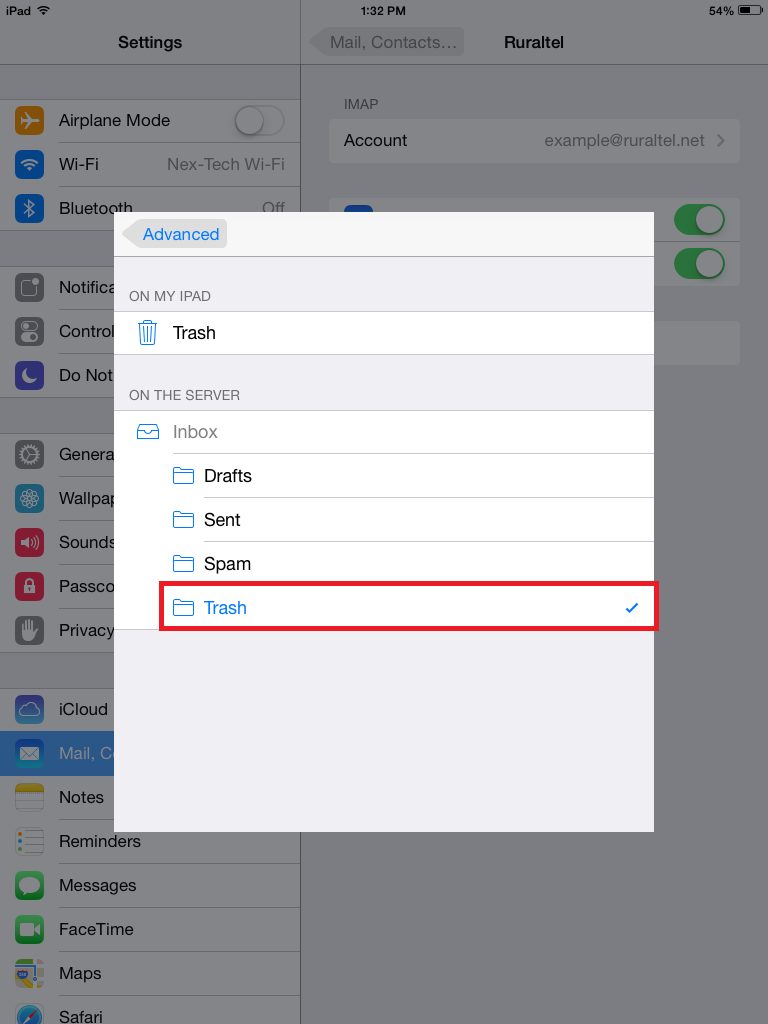
Now under MAILBOX BEHAVIORS, tap on Deleted Mailbox. Now under ON THE SERVER, tap on Trash. Now tap on the Advanced back arrow at the top left to take you back to the previous screen. Now tap the Account back arrow at the top left to take you back to the Account screen. Now hit Done at the top right.
-
Press the home button at the bottom of the Apple device to take you back to the home screen. Now tap on Mail. Your email should now be setup and working properly.

IMAP Settings
- On your Apple device, tap on Settings.
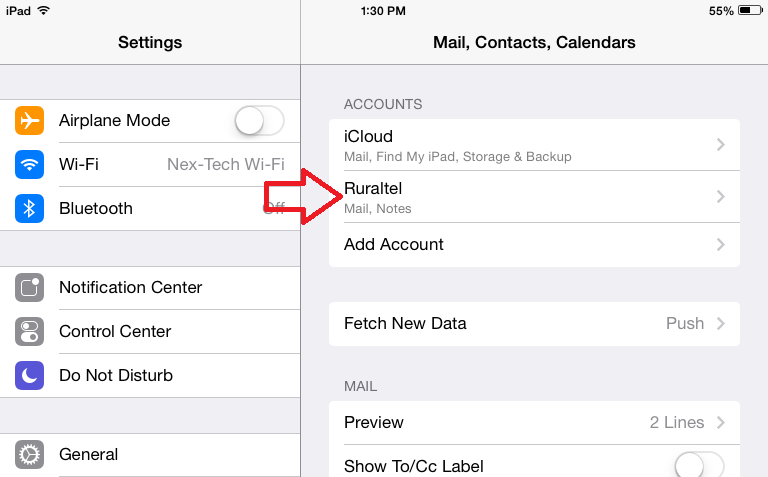
- Tap on Mail, Contacts, Calendars. Then under ACCOUNTS, tap Ruraltel.
- Now below IMAP, tap on Account.
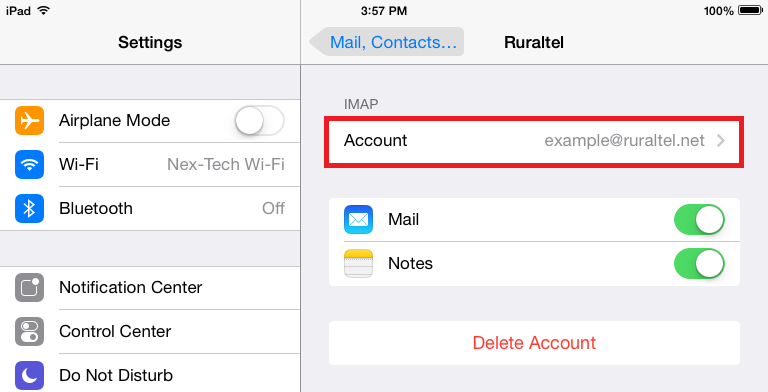
- On the Account window, verify all the settings below are correct:
- Email: example@ruraltel.net - If the email address is NOT correct, the account will need to be deleted and recreated as it CANNOT be edited.
- Host Name: imap.ruraltel.net
- User Name: example@ruraltel.net (FULL EMAIL ADDRESS)
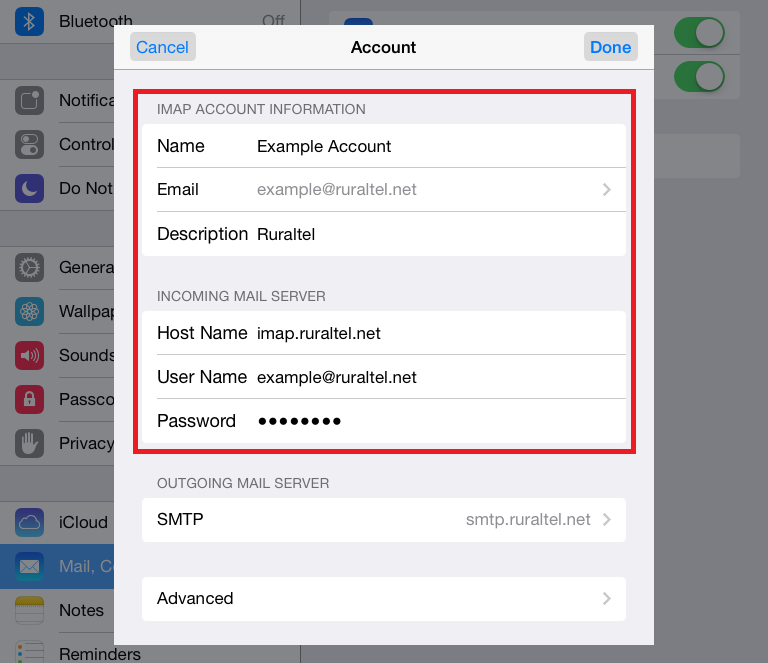
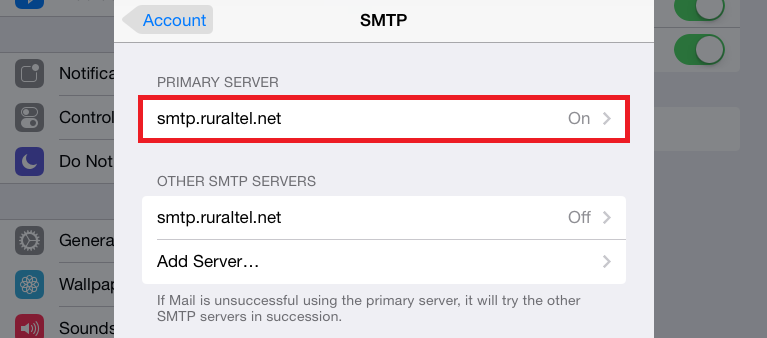
- Next, under OUTGOING MAIL SERVER, tap on SMTP.
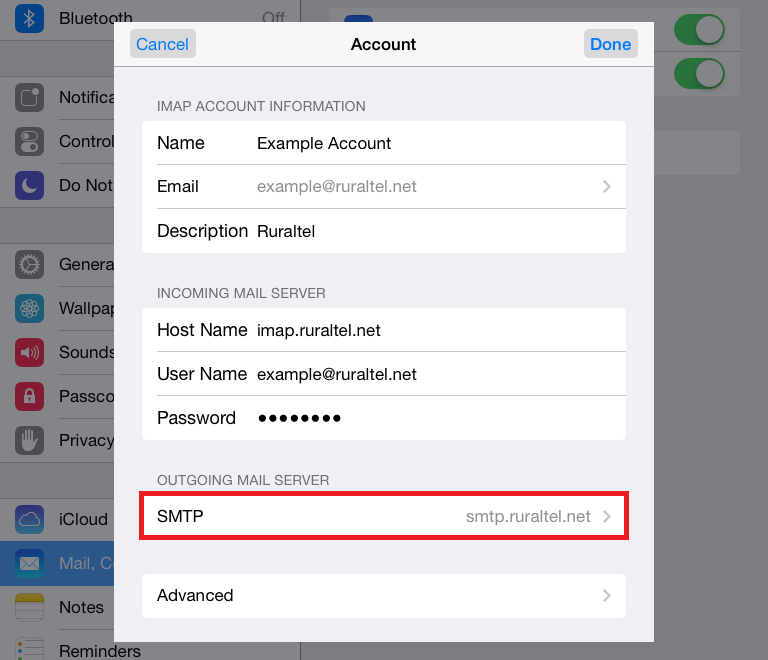
- Under PRIMARY SERVER, tap on smtp.ruraltel.net.
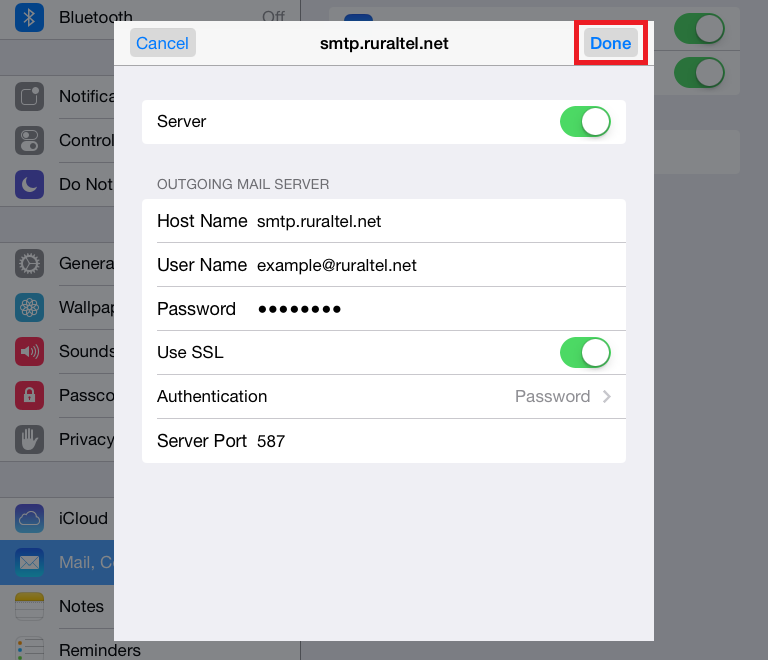
- Verify the following settings on this window:
- Host Name: smtp.ruraltel.net
- User Name: example@ruraltel.net (FULL EMAIL ADDRESS)
- Use SSL: White is off and Green is on, both on and off should work.
- Authentication: Password
- Server Port: 587 if SSL is ON, 25 if SSL is OFF.
- Now hit Done at the top right, then the Account back arrow at the top left.
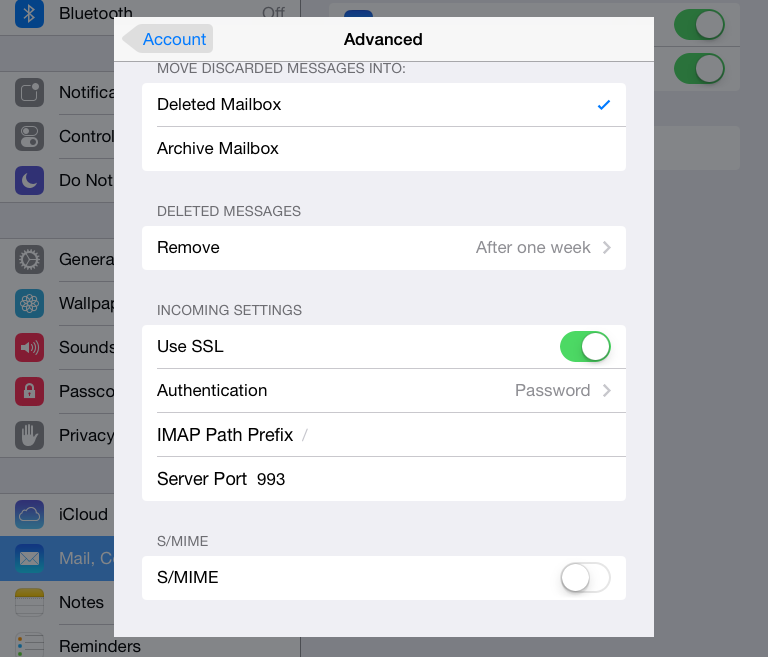
- You should be back on the Account page now. Tap on Advanced at the bottom.
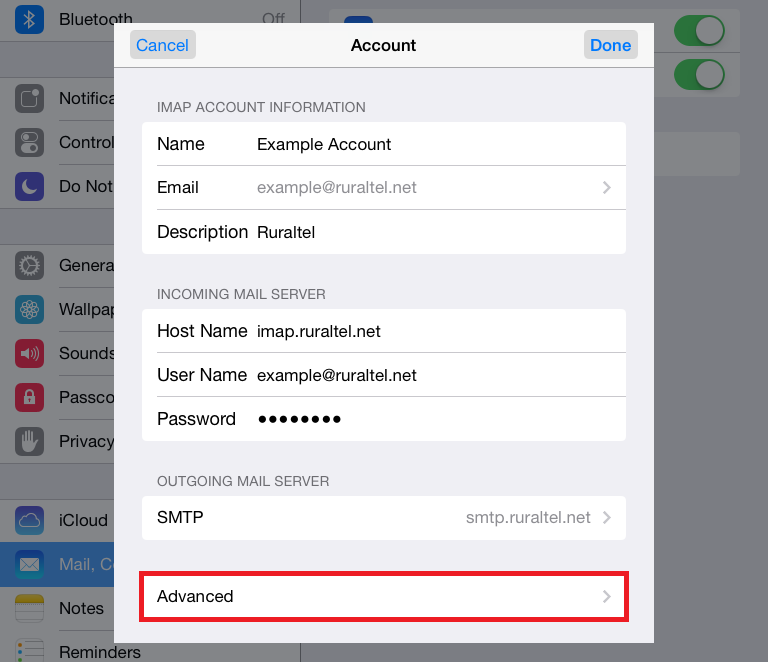
- Verify the following settings on this window:
- Use SSL: White is off and Green is on, both on and off should work.
- Authentication: Password
- Server Port: 993 if SSL is ON, 143 if SSL is OFF.
- Now hit the Account back arrow at the top left, then Done at the top right. Test the email account and it should be working now.