How to Set up a Basic Web Site
- Select Site >New Site
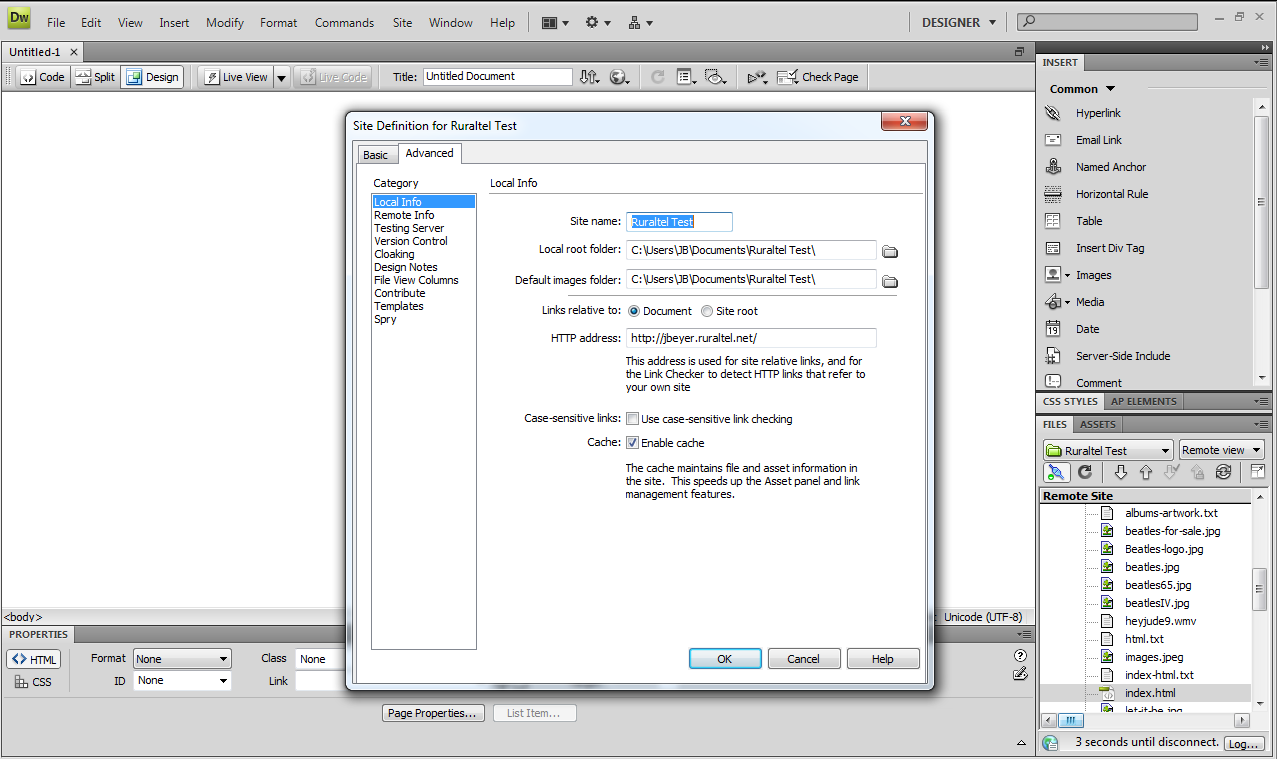
- When the dialog pops up, we first want to make sure we are under the Advanced tab and on the left hand side Local Info should be highlighted in blue.
- Fill out the customers information, they should already have a location for all of their files on their computer, if they do not, you will have to manually browse for that folder. (Same as with images folder)
- The HTTP address should simply be the address of their website.
- Once we have all of the information filled out under the Local Info section, we are now ready to move to Remote Info.
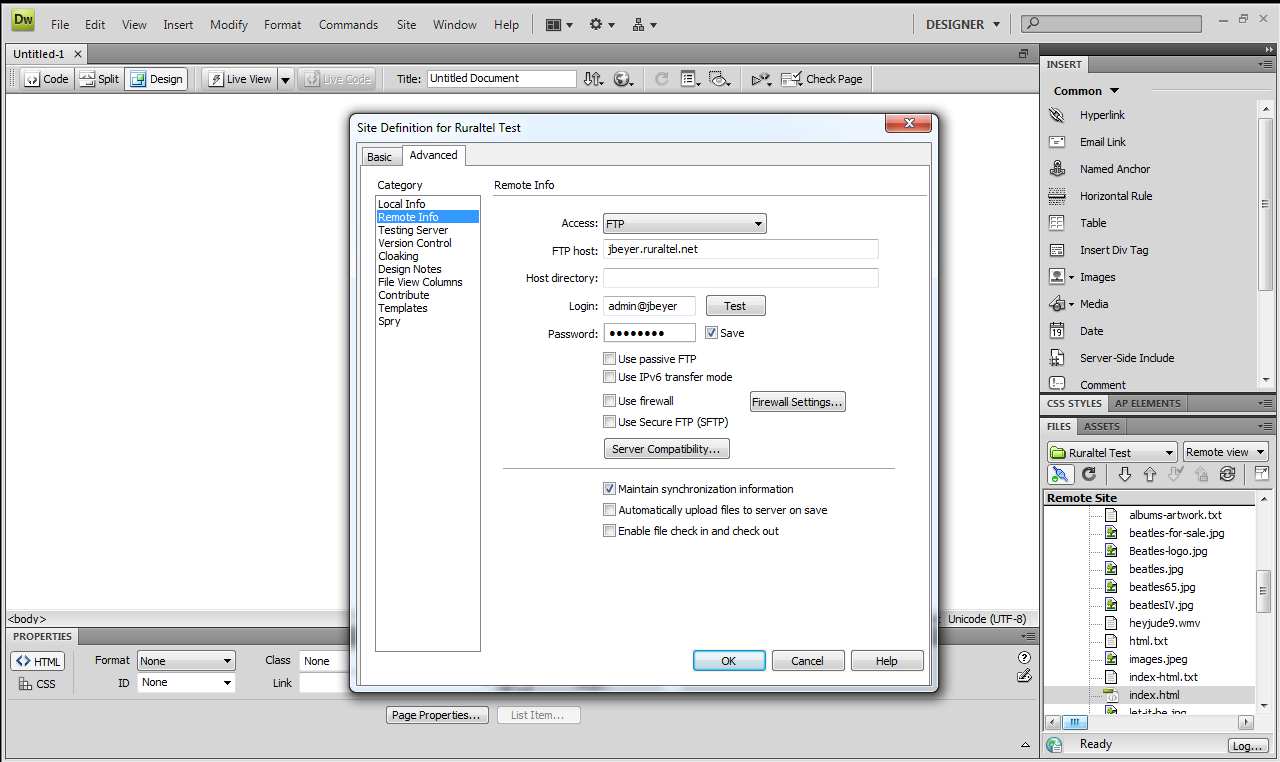
- Under the Remote Info section, this is where we choose which protocol to upload our website with, (FTP should be default)
- In the FTP Host blank, we need to type in the web address of our website (jbeyer.ruraltel.net) This should match what we entered under local info for out HTTP Address.
- The login infomation the customer should have already acquired previously from their server admin (Nex-Tech does not have any of this personal information)
- Once you have all your site information entered in, you are ready to FTP to your website using Dreamweaver's built in FTP Client which is located on the Bottom Right hand side.
- To connect to your remote site, click on the icon which looks like two ends of an extension cord coming together (If you hover over the icon, it should read "Connects to remote host"
- Now that you are connected to your remote site, you can start creating your webpage. Any content that you add to your page, you will need to upload to the server, to do this click on the Put Files Icon (It is very important to do this often, especially before closing out of Dreamweaver or your remote site will not update, only your local site on your computer will)
- The last step to perform will synchronize your local site to your remote site, this will post any updated pictures or pages to your webpage. To do this, simply click on the icon directly located under the view drop down menu, if you hover over the icon it will read Synchronize. After the synchronization is complete, your site should be live.
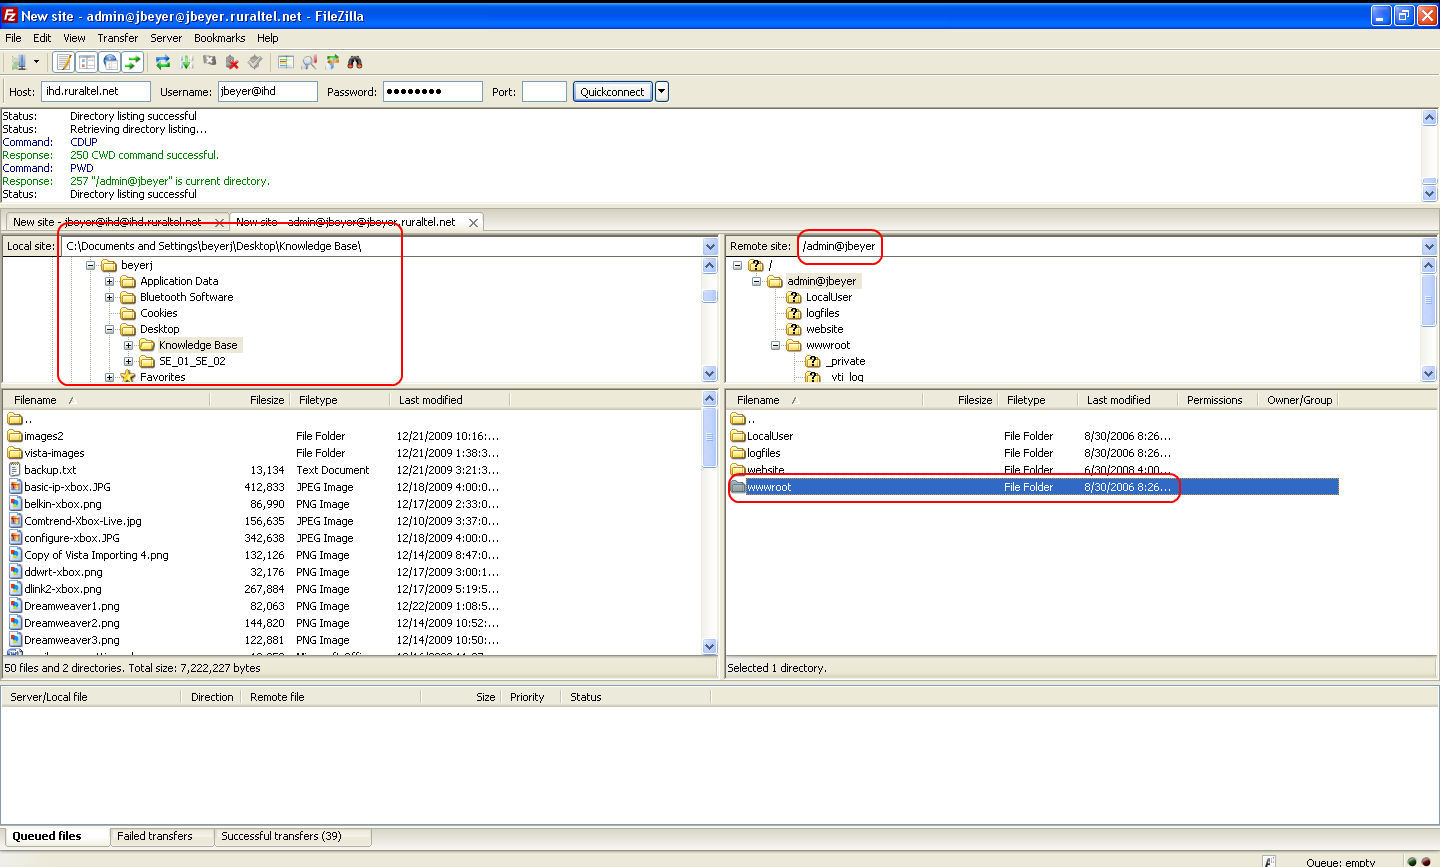
How to Maintain and Update a Website using an FTP Client ie FileZilla
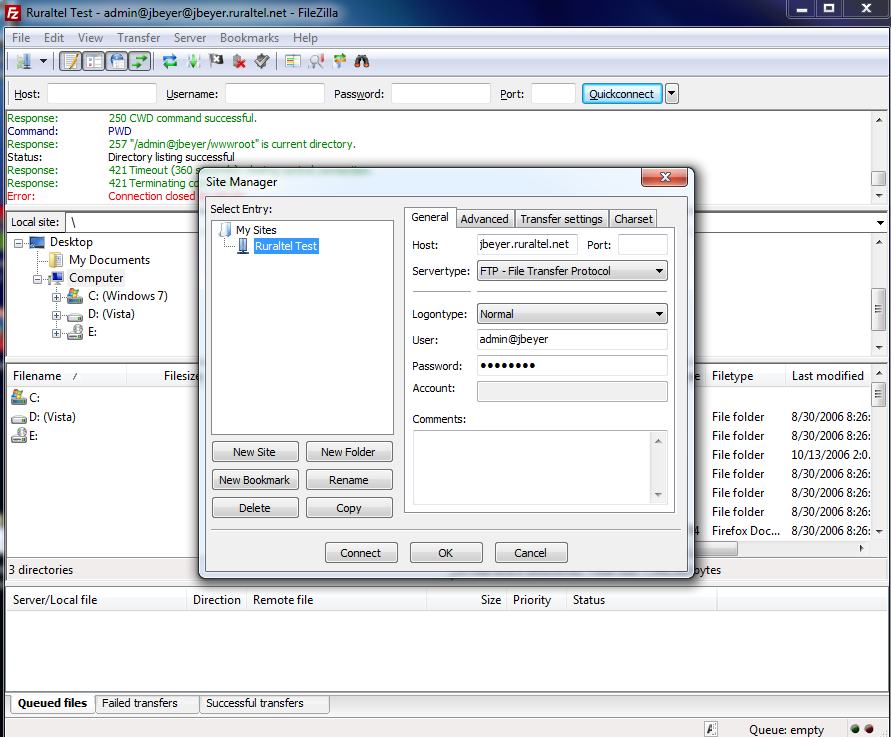
- The first step when setting up your new website in the FTP Client is to click on File at the top then choose Site Manager
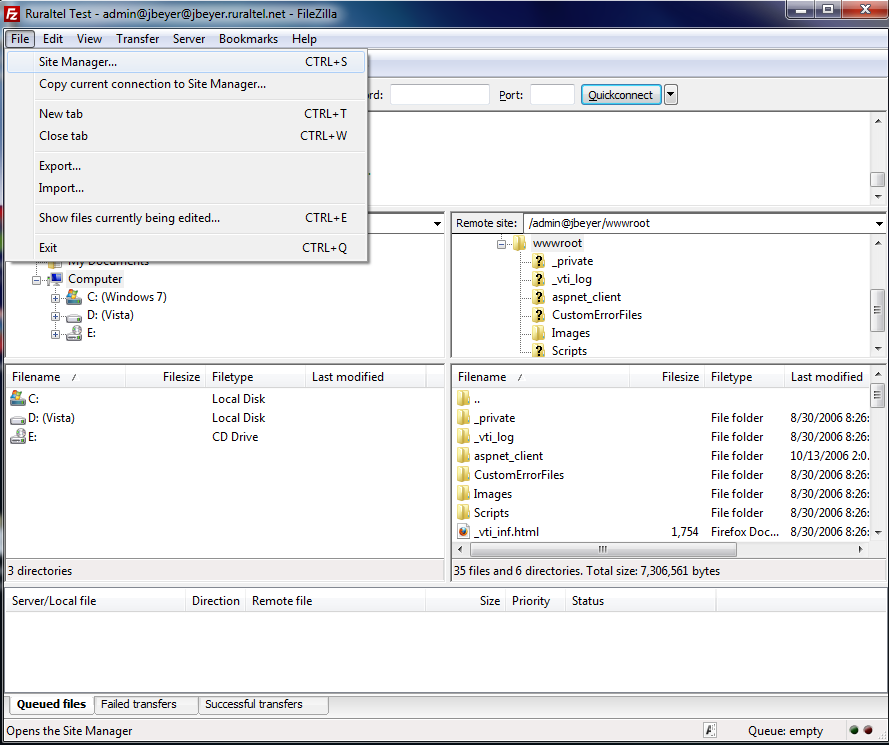
- This is where we can start to create our new site, we want to click on the link that states New Site.
- We now need to fill in our Host: which is the address of the website you want to FTP to.
- For the Servertype: and Logontype: User: and Password: The customer should have all the required information to fill out this part. (Nex-Tech will NOT have this information on hand)
- Now that we are connected to our website, its time up upload everything from your local folder on your computer.
- FileZilla's UI is split into two sides, the left side is your Local Site: On this side you will locate all the information you wish to upload to the website.
- The right side of the UI is designated for the Remote Site: or your website. This is where you will upload all your infomation to so it can be seen via a web browser.
- When uploading to your site, you need to make sure you are uploading it to the correct folder on the server, the correct root folder is normally called wwwroot.
- You can select one or multiple files at a time to upload, once you have the selected files you wish to upload, Right Mouse Click and choose Upload. You should now see the files you choose to upload in your designated folder on the Remote Site: side.