Wired Printer Install/Troubleshooting for Windows 10
Printer Install and Troubleshooting for Windows 10
If your printer connects by a wire, plug it into your device. It'll connect automatically, your PC will download the right drivers, and you can use it right away. To connect a wireless printer, follow these steps:
-
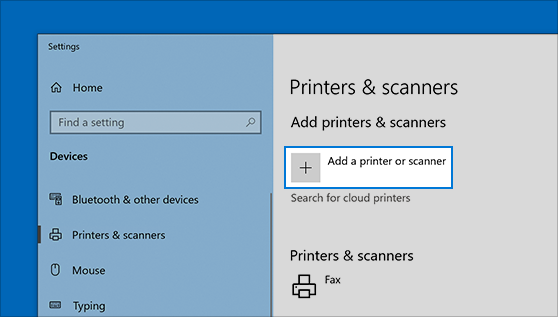
Select the Start button, then select Settings > Devices > Printers & scanners > Add a printer or scanner.
-
Wait for it to find nearby printers, then choose the one you want to use, and select Add device. If you want to remove the printer later, just highlight it and select Remove.
If your printer isn't responding, you may need to remove it and reinstall it so Windows can download and install the proper drivers.
Make sure your printer is on and connected to your PC.
Open Start > Settings > Devices > Printers & scanners. Select the name of the printer, and then choose Remove device.
To reinstall the printer, select Add a printer or scanner and then select the name of the printer you want to add. If Windows doesn’t automatically find a new driver after the printer is added, look for one on the device manufacturer's website and follow their installation instructions.
To choose a default printer:
-
Select Start > Settings .
-
Go to Devices > Printers & scanners > select a printer > Manage. Then select Set as default.
If you don't see the Set as default option, the Let Windows manage my default printer option may be selected. You'll need to clear that selection before you can choose a default printer on your own.
How to set a default Printer:
Your default can be the printer you last used. To turn on this mode:
-
Open Start > Settings > Devices > Printers & scanners.
-
Select the checkbox beside Let Windows manage my default printer.
To view a list of items waiting to print in Windows 10:
-
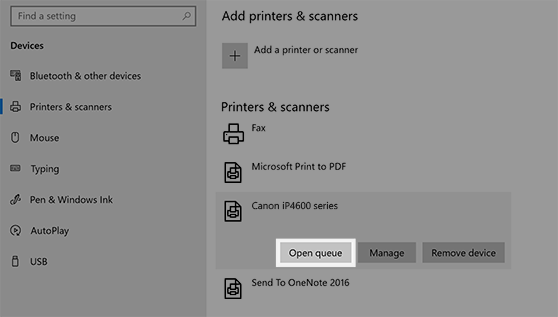
Select Start > Settings > Devices > Printers & scanners .
-
Select your printer from the list and then select Open queue to see a list of what's printing and the upcoming print order.
Your printer might appear offline if it can't communicate with your PC. Here are some things to try to get your printer back online.
-
Check to make sure the printer is turned on and connected to the same Wi-Fi network as your PC. Your printer's built-in menu should show which network it's connected to, or check your printer's manual for more info.
-
Verify that your printer is not in Use Printer Offline mode. Select Start > Settings > Devices > Printers & scanners. Then select your printer > Open queue. Under Printer, make sure Use Printer Offline is not selected.